By Kristen Mangus
Thanks to KB Looms for for sponsoring this pattern and tutorial. I also want to thank them for providing the fantastic set of Premium Chunky Round Looms used for this pattern design, but also the extra sets that I was able to give away during the Facebook Live unboxing.
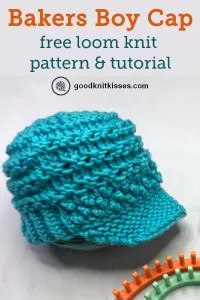
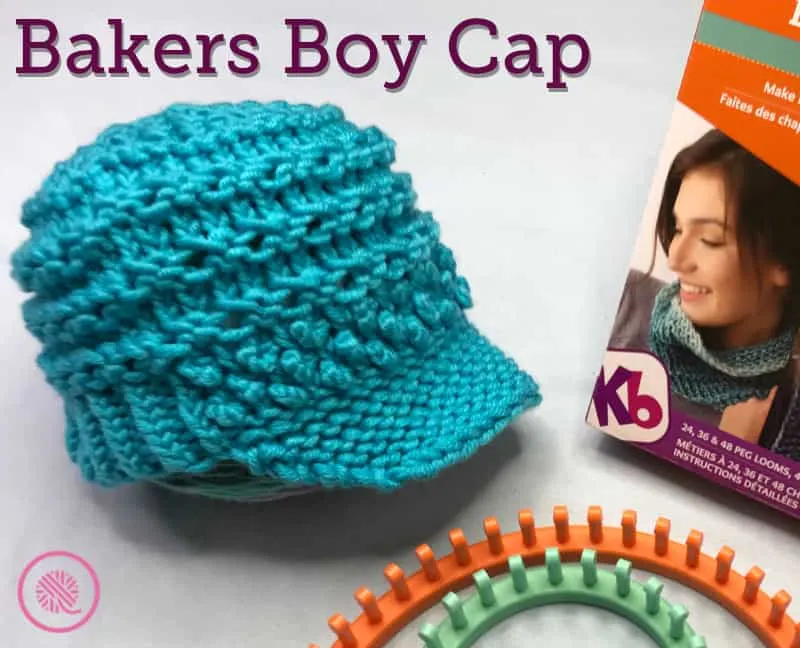
My latest pattern is a throwback to a classic Bakers Boy cap with a trendy twist. This Bakers Boy Cap features a short soft brim with a bobble accent to mimic the strap. The sides and back of the brim are ribbed vertically while horizontal bands feature a series of eyelets for a unique textured lace look.
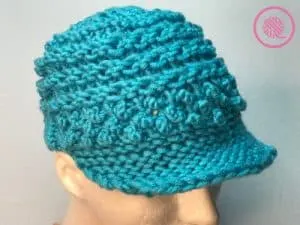
The Bakers Boy Cap rests above the ears and is meant to be worn resting on the head rather than pulled down like a beanie. The top is flat with a special double decrease on the crown that uses two different looms. Don’t worry it’s actually very easy to do. You’ll see when you watch the full video tutorial below.
Game-changing Loom News!
Speaking of looms, have you heard about the new looms in town? If not, you’d better sit down because this news is BIG!
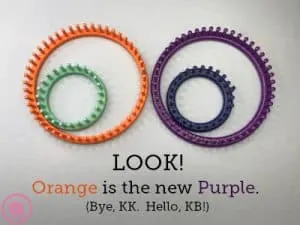
Yes! Finally! They heard us! KB Looms has released their Premium Chunky Round Loom Set in 5/8″ gauge (affiliate link). It includes a 48-peg loom. This is identical in gauge and size to the coveted Knifty Knitter purple hat loom. You know the one that is discontinued and sells on Ebay for roughly a gazillion dollars.
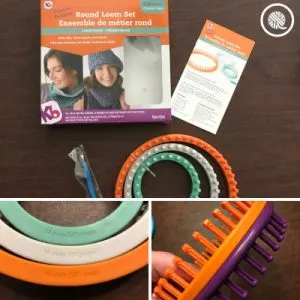
The set includes 3 looms in 5/8″ (large) gauge with 24, 36 and 48 pegs. Oh, and the gauge and peg count are marked on the bottom of the loom. Ditch the sharpies and the measuring tape because it’s printed on the loom! See my full Facebook Live unboxing below as I show you the new set plus the new Baby Knit Loom set from KB.
Bakers Boy Cap Pattern
For a downloadable PDF of this pattern click here:
MATERIALS
Yarn – Premier Everyday Bulky color Turquoise. 1 skein (87 yds / 80 m / 3.5 oz / 100 g). Super Bulky 6 weight.
2 Looms – ⅝” Large Gauge (LG) round looms. One 24 peg and one 48 peg loom. Knitting Board 48 peg (orange) and 24 peg (light green) from Premium Chunky Round Loom set (affiliate link) were used in sample.
Loom Tool
Crochet hook – any size that fits between pegs for chain cast on
2 Stitch markers (optional 4 extra for crown)
Tapestry needle
ABBREVIATIONS
EK = Ewrap knit
HH = Half Hitch; a thumb cast on to increase, looks much like an upside down Ewrap. Hold yarn out and twist into an Ewrap circle. Turn over so it lays flat on next empty peg. Pull working yarn to tighten. Working yarn should be coming out from bottom of wrap.
KO = Knit Over pegs with more than one loop so one loop remains.
K2tog = Knit 2 together (Decrease): Place two stitches on one peg and knit over both at same time. Lean or slant of this decrease does not matter, just be consistent.
MB = Make Bobble: EW and knit off 5 times on the same peg. Then reach behind peg, pick up stitch from previous row below and place on peg. Work bottom loop over top loop. This completes one Bobble.
P = Purl
P2tog = Purl 2 together (Decrease): Place two stitches on the same peg and purl both at same time. Lean or slant of this decrease does not matter, just be consistent.
PM = Place marker: Put stitch marker on peg.
Rep = Repeat
Rnd = Round
SL = Slip Stitch: Do not work stitch. Skip to next peg.
St(s) = Stitch(es)
UK = Uwrap Knit
EW YO = Yarn Over (Increase): Ewrap empty peg.
GAUGE 5 sts x 12 rows in 2” in garter stitch
SKILL LEVEL Easy
SIZES One Size fits most Adults (Med/Large)
NOTES
Visor is worked as a flat panel then additional stitches are cast on. The rest of the hat is worked in the round.
The hat features a flat, decreased crown that is worked on TWO looms. After the first decrease the entire project is transferred from the 48-peg loom to the 24-peg loom to finish.
PIN THIS PATTERN!
INSTRUCTIONS
VISOR (worked in flat panel):
Chain Cast On Right to Left 16 sts.
Row 1: SL. EK 15 (16 sts).
Row 2: SL. EK 1. P until 1 stitch remains, EK 1.
Row 3: HH. EK remaining sts. HH. (18 sts).
Row 4: SL. EK 1. P until 1 stitch remains, EK 1.
Row 5: HH. EK remaining sts. HH. (20 sts).
Row 6: SL. EK 1. P until 1 stitch remains. EK 1.
Row 7: HH. EK remaining sts. HH. (22 sts).
Row 8: SL. EK 1. P until 1 stitch remains. EK 1.
Row 9: HH. EK remaining sts. HH. (24 sts).
Row 10: SL. EK 1. P until 1 stitch remains. EK 1.
Row 11: SL. EK remaining sts. (24 sts).
Row 12: SL. EK 1. P until 1 stitch remains. EK 1.
Connect hat in round:
Lift last stitch made and PM on peg. This is now Peg 1. Using this loop, chain cast on Peg 1 and all pegs on loom (48). Place remaining loop on Peg 1 so that two loops are on Peg 1. Pegs 2-25 will have one loop each and Peg 1 and Pegs 26-48 will have two loops each. KO pegs with 2 loops so that 1 loop remains. This will make the visor stick out.
Begin working in the round at peg 1 working clockwise.
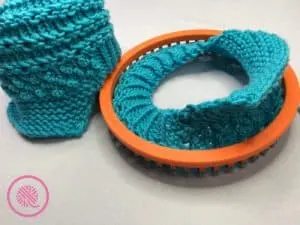
HAT BRIM & BODY:
Rnd 1: (EK 1. P1) 13 times. PM at peg 27. P 22.
Rnd 2: (EK 1. P1) 13 times. EK 22.
Rnd 3: (EK 1. P1) 13 times. Starting at marker *EK1, MB* rep from *,* to end.
Rnd 4: (EK 1. P1) 13 times. EK 22.
Rnd 5: (EK 1. P1) 13 times. Starting at marker *MB, EK1* rep from *,* to end.
Rnd 6: (EK 1. P1) 13 times. EK 22.
Rnd 7: (EK 1. P1) 13 times. Starting at marker *EK1, MB* rep from *,* to end.
Rnd 8: EK 48.
Rnd 9: *P 1. P 1 then place on peg before.* rep till 24 pegs have 2 loops.
Rnd 10: *P2tog. EK YO*. rep (you’ve already moved your loops over for the p2tog on previous rnd).
Rnds 11-13: EK 48.
Rnd 14: *P 1. P 1 then place on peg before.* rep till 24 pegs have 2 loops.
Rnd 15: *P2tog. EK YO* rep from *,* to end.
Rnds 16-18: EK 48.
Rnd 19: *P 1. P 1 then place on peg before.* rep till 24 pegs have 2 loops.
Rnd 20: *P2tog. EK YO*. rep till end of rnd.
Rnds 21-23: EK 48.
Rnd 24: P 48.
Rnd 25 UK 48.
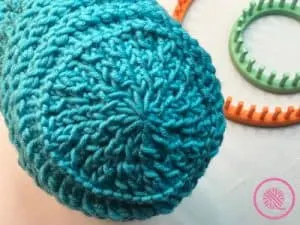
*CROWN:
Note: Uwrap (UK) knit all stitches in crown staring at Round 25. EK works but will be a more open stitchwork.
Decrease 1:
Divide loom into sections of 6 pegs (8 sections); place stitch markers to mark 1st peg in each section of 6 pegs.
Rnd 1: Move peg 2 to 1 each section. *K2tog. SL. UK 4* rep from *,* to end (40 sts).
Rnd 2: Move peg 4 to 3. *UK. SL. K2tog. SL. UK 2* rep from *,* to end (32 sts).
Rnd 3: Move peg 6 to 5. *UK. SL. UK. SL. K2tog. SL* rep from *,* to end (24 sts).
Decrease 2:
Use scrap yarn to weave through remaining 24 loops. Take off the 48-peg loom to transfer to 24-peg loom and take out scrap yarn; pull out slack if needed from previous row, make sure not pulling too tight. Mark peg 1. Divide loom into sections of 6 pegs (4 sections); place stitch markers to mark 1st peg in each section of 6 pegs.
Rnd 4: UK 24.
Rnd 5: Move peg 2 to 1 each section. *K2tog. SL. UK 4* rep from *,* to end (20 sts).
Rnd 6: Move peg 4 to 3. *UK. SL. K2tog. SL. UK 2* rep from *,* to end (16 sts).
Rnd 7: Move peg 6 to 5. *UK. SL. UK. SL. K2tog. SL* rep from *,* to end (12 sts).
Rnd 8: UK 12.
BIND OFF: Drawstring or Gathered Bind off. Secure end and weave in tails.
Bakers Boy Cap Tutorial Video for Right Handers:
Bakers Boy Cap Tutorial Video for Left Handers:

Sharvari
Tuesday 28th of February 2023
Can I use a #5 yarn for this pattern?
Lindley Argo
Friday 30th of November 2018
Does it matter if I have a different loom with fewer pegs? Will this pattern still work?
Joann Gay
Friday 30th of November 2018
Hi, Lindley! This hat is designed specifically for a 48-peg loom with 5/8" gauge. Using a different loom will not work for the pattern as it written. Kristen does have a video for figuring out the number of pegs you need to add a hat visor using ANY loom. Here's the link: https://youtu.be/CW_1BZILnIQ
Lindley Argo
Friday 30th of November 2018
Does it matter if I have a different loom with fewer pegs? Will this pattern still work?
Laura
Friday 9th of November 2018
Where is the link to this pattern? Please and thank you.
Joann Gay
Thursday 15th of November 2018
The pattern is listed above in the blog post. There is a downloadable PDF version for sale on Ravelry. Click the small Buy Now button above for that one.
Joann Gay
Thursday 15th of November 2018
The pattern is listed above in the blog post. There is a downloadable PDF version for sale on Ravelry. Click the small Buy Now button above for that one.
Laura
Friday 9th of November 2018
Where is the link to this pattern? Please and thank you.