Family Mittens | Yarnspirations
It’s all apples, pumpkins and crisp, colorful leaves right now. I love a good pumpkin spiced latte and Thanksgiving is my favorite holiday so I know what I’m talking about. Fall doesn’t get any better! It actually gets worse. It gets worse because it has to end. As much as I wish Fall would last forever, it doesn’t. For you forward thinkers that like to plan ahead I’ve got an essential Family Mittens pattern to share from Yarnspirations.
The Basic Family Mittens hits every tick mark on your checklist:
- Sizes for everyone from toddlers to adults
- Economical – Using one skein of Caron One Pound you can make 5 pairs of adult mittens or up to 12 pairs of toddler size!
- Fast and easy to knit
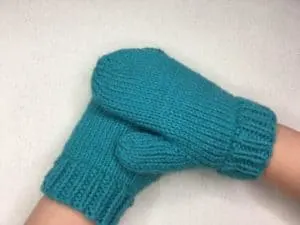
Pattern:
Caron Basic Family Knit Mittens
Yarn:
1 skein Caron One Pound
Makes 12 pairs of toddler, 7 pairs of child or 5 pairs of adult mittens per skein!
Needles & Supplies:
Size US 6 (4 mm) needles or size needed to obtain gauge (Straight or circular can both be used.)
Stitch holders
Measuring tape
Tapestry needle to weave in ends
Skill Level:
Beginner
Sizes
To fit 2/4 yrs, 8/10 yrs and Adult
Gauge:
18 sts and 24 rows = 4” [10 cm] in stocking st.
Skills shown in this tutorial:
Cast on
Knit stitch
Purl stitch
K2tog – knit next two stitches together
Kfb – knit into the front and back of the stitch
Bind off
Seaming
PIN IT!
Let’s get knitting before the snow flies!
Basic beginnings…
The start of this mitten is super easy. I did the longtail cast on because I like the finished edge and stretchiness of this cast on. If you have another cast on you prefer, go ahead and work that one. This mitten uses a 1 x 1, or K1, P1, ribbing to give it that telltale cuff that keeps the snow out. This is all straight up knits and purls. If you need a refresher on just those stitches I have a great playlist that shows these simple stitches HERE. After the ribbing you knit in stockinette stitch until you reach the specified length. This section is knit the same on both mittens.
Thumbs up!
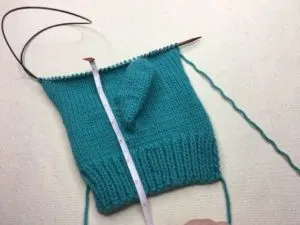
After you finish the base of the mitten you begin to shape the thumb gusset. You may not even know what a gusset is, but you are about to make one! (In case you’re wondering, a gusset is the triangular-shaped portion at the base of the thumb that widens the mitten at that point to fit the thumb.)
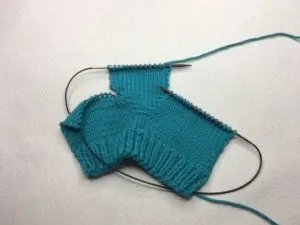
The thumb gusset is worked using a series of Kfb increases. You’ll notice the larger the mitten size the longer the gusset portion. This will stretch your pattern reading skills! You’ll need to pay close attention to make sure you are following the proper instructions for the size you are making. I suggest marking a printout of the pattern to show which rows you need to work.
Hold on to your stitches!
Now we’re getting to the challenging part of the pattern. Moving some stitches to a stitch holder and working only a portion. While you can use a traditional stitch holder, I show you how to a length of cable on your circular needle to hols the stitches while you continue to knit this section. Knit the thumb to the specified length then work a decrease row to reduce bulk at the end of the thumb. To complete the thumb cut the yarn leaving a long yarn tail (15+inches). Using a tapestry needle remove the thumb stitches and thread them onto the yarn tail. Pull the stitches to tighten the end of the thumb and stitch the seam to the base of the thumb.
Back to basics…
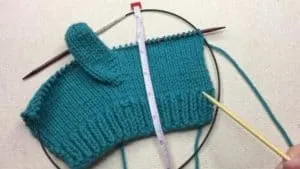
You need to get back to a single flat panel to finish your mitten. You start by working across the row until you reach the thumb. Pick up stitches along the base of the thumb and then finish the row. You clearly see in the video which stitches to pick up so there’s no guesswork. Once you have one full row again just continue in stockinette stitch until you reach the correct length. So easy!
The last step is working a series of decrease rows to shape the top of the mitten. This uses a simple K2tog, or Knit two stitches together. Once you finish the shaping cut the yarn leaving a tail long enough to seam the side seam. Just like you did for the thumb, pick up the stitches, draw the top closed and seam the side of the mitten.
The End … (not really!)
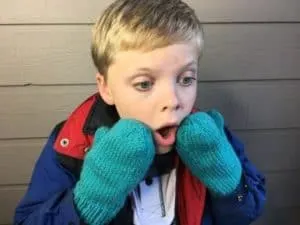
You did it! You finished the mitten!! Do you feel that huge sense of accomplishment? You should because you earned it. But I feel like the bad guy again. First, I interrupted your Fall to talk about Winter and now I am forced to remind that you still have to knit the other mitten. Notice that some portions of the pattern ARE different for the left and right mittens. But I promise the second one is easier. Besidese it’s worth it to see the look on your child’s face when he sees the mittens YOU made!
Check out the video below for the full tutorial!
This post and video are sponsored by Yarnspirations. You can see more great patterns and browse the delectable yarn selection at yarnspirations.com.

Viola
Monday 9th of December 2024
Hi...is there a way to use the calculator to knit mittens ? I can no long knit a blanket without your calculator !! I have no idea on how to measure mittens...just the top of the hand or all the way around, including the thumb ? Thank you so much.
Lyn Brown
Sunday 14th of January 2024
Could you send this pattern as we can’t find toddler mittens in the shops
Alice Edmisten
Saturday 23rd of December 2023
Just what I need to make!
Mary
Friday 22nd of December 2023
Hi, Kristen, can you use circular needs that are a 4.5 5.5 and are 29 length. also I have a lot of yarn the is studio classic by Nicole can you use that. I love your video so nice to follow. Thank you
Jackie Hopkins
Monday 4th of December 2023
Could you please send me a copy of this pattern.