Inside: Detailed instructions with tutorial video showing how to make a gauge swatch and take accurate measurements.
First, knit a gauge swatch..
We’ve all seen these instructions in patterns, but what does it mean to knit a gauge swatch?
I’m going to explain in detail not only how to make a gauge swatch, but when it’s most important.
What is a swatch?
A swatch is a small sample of your knit project. It is made using the same yarn, needles or loom, and stitch pattern of the project you plan to make. You may also hear it referred to as a gauge swatch or test swatch.
A swatch is used to calculate the number stitches per inch and the number of rows per inch.
When working an existing pattern, you compare the numbers you get to the gauge listed in the pattern. If your numbers match up, or are very close, your project will knit up to the intended size. If not, you may need to use a different needle size or a different gauge loom to match the correct gauge.
If you’re not using a pattern a gauge swatch can help you figure out how many stitches to cast on and rows you need to knit to get the size you want. This is the easiest way to take a beautiful stitch pattern you like and design your own blanket.
Why make a swatch?
Swatching, or making and measuring a gauge swatch, isn’t always necessary. I don’t always make a gauge swatch before I start a project. But there are certain projects that I would never tackle without making one. So, when is it important?
I ALWAYS make a gauge swatch for:
- Garments like sweaters and vests
- Socks
- Baby clothes
- Any other project that requires accurate sizing
- Projects with new stitch patterns I’m not familiar with
- Making a project in a new yarn I’ve not tested before

I RARELY swatch for:
- Scarves (If it’s 1/2″ too wide or too narrow, it’s not a big deal.)
- Hats (especially loom knit hats since they are often sized according to the loom)
- Blankets (again, if my blanket is few inches too wide, I’m usually okay with that.)
- Stitch patterns, yarns and projects I use regularly (I’ve already tested the gauge and wrote it down last time, right?)
How to make a gauge swatch?
Using the yarn, stitch pattern, and needles or loom for your project knit up a small sample. I like to knit a square at least 6″ x 6″. Much smaller than that and it will be difficult to measure a 4″ x 4″ section in the center.
[Note: If you use the metric system all the principles and methods still apply.]
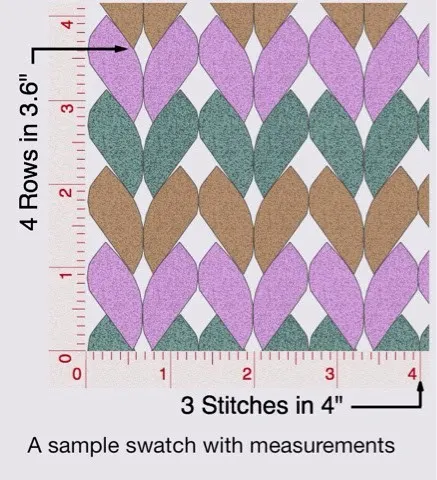
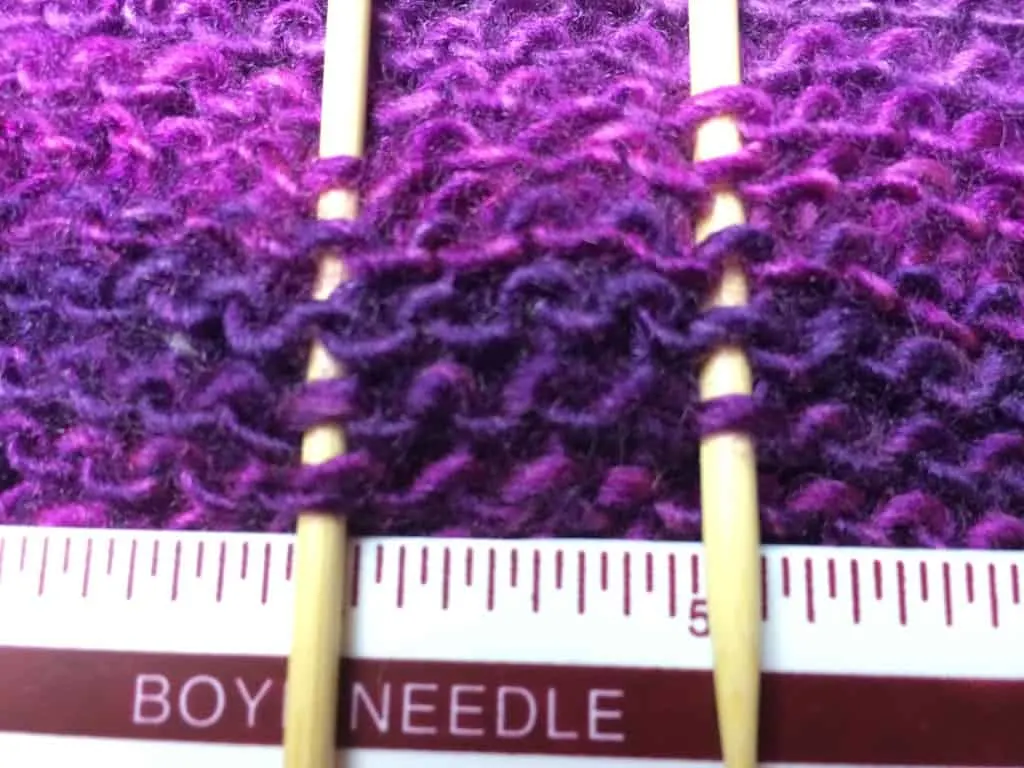
Next measure how many stitches you have in a 4″ section of the same row. Then measure the number of rows in a 4″ section in the same column. You can count partial stitches (1/2 stitch or less does make a difference in sweater!) or measure a larger section.

I like to use double pointed knitting needles to mark the section I’m measuring as seen in the picture below.

What do I do with the measurements from my swatch?
Well, I hate to say it, but you use MATH!
Yes, that same math that you thought you’d never need. Accurate knitting requires a few simple calculations:
Stitch Gauge:
S = stitches in swatch
W = width of swatch in inches
S/W = stitches per inch
GS = Pattern gauge standard*
Stitch Gauge = pG x (S/W)
Rows Needed:
R = rows in swatch
L = length of swatch in inches
R/L = rows per inch
GS = Pattern gauge standard*
Row Gauge = GS x (R/L)
*The pattern gauge standard is the measurement the designer used to test the gauge. This number is usually 4″ (10 cm) but occasionally it can be different. Example: The pattern lists the gauge as “16 sts x 41 rows in 4” in beehive waffle stitch pattern.” You would use 4 as the pattern gauge standard.
If you’re not using a pattern, and need to figure out how many stitches to cast on knitting or loom knitting, I recommend my Interactive Knitting Calculators. They do the math for you!
