
Inside: Full pattern for the woven Alice Tote Bag. This design uses squares woven on a potholder loom to make this large sturdy tote. Includes instructions, schematics and tutorial videos.
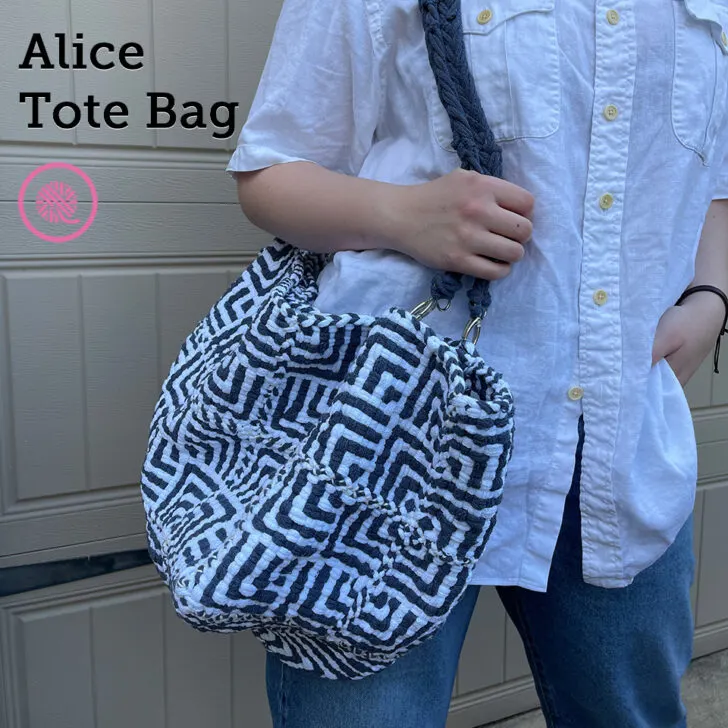
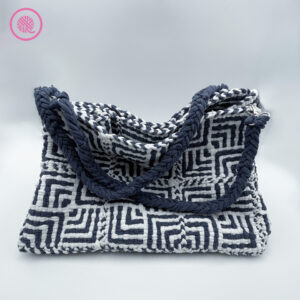
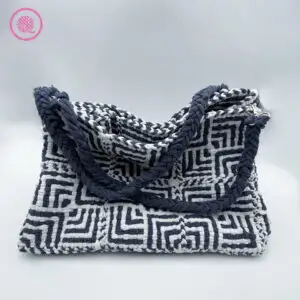
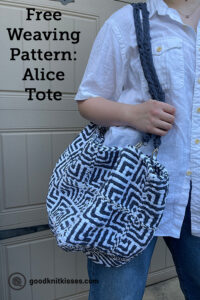
Introducing the Alice Tote Bag! This sturdy tote bag is made up entirely of squares woven on a potholder loom. The bag features 4 different designs that are seamed to create the bottom, sides and pockets plus removable braided handles.
Who doesn’t love a big roomy bag with lots of pockets?
The woven Alice Tote Bag has 3 pockets. The largest pocket covers one entire side of the bag. I can easily fit my iPad, notebook and pattern books. The medium sized pocket is perfect for my bag of tools and notions. And we all know the small pocket is for my phone. I have to have a place for that.

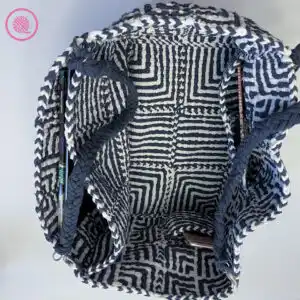
I decided to keep my bag open at the top, but you could easily add some toggle or magnetic closures to close the bag.
I named this bag in memory of my mom, Alice. I lost her last year and ever since then I’ve been wanting to make something to honor her.
I was going to make some polka dot socks, but the pattern just didn’t come together. Then I started a shawl, but I just felt so sad every time I picked it up to work on it.
As I was working on this bag pattern, I ended up choosing colors that she loved. And the fun quilt-like design just fit my mom’s style. I realized it was the perfect design to honor my mom.. But even more important, using it reminds me of her and brings me joy.
I hope it brings you joy, too!
This woven Alice Tote Bag pattern contains written instructions and links to weaving charts for each design and fully-captioned tutorial videos showing each square, plus how to make the handles and assemble the bag.
Woven Alice Tote Bag
By Kristen Mangus
An ad-free downloadable PDF of this pattern is available for purchase in my GoodKnit Kisses online store or on Etsy at the links below:


MATERIALS
(Materials list may contain affiliate links to products I used to make this project. Using these links costs you nothing, but helps support GKK.)
Loom
⅜” potholder loom with 72 pegs.
CinDWood ⅜” Small 7” Hot Pad/Potholder Loom used in sample. This loom is available alone or bundled with a bag of loops. Use code goodknitkisses for $5 off your loom purchase.
Loops
1320 cotton potholder loops (for 7” loom).
Color A: 646 loops (White)
Color B: 674 loops (Denim)
Loops were purchased from friendlyloom.com. (Denim is an exclusive Loop Group color.)
Notions
Weaving tool
Crochet hook to bind off
1” Swivel Snap Hooks – 4 (2 per handle)
Locking stitch markers to mark right side of bag pieces (optional)
Tapestry needle for seaming
Mercerized cotton yarn for seaming in a color to match your bag. (I used Yarn Bee Fundamental Cotton. Lion Brand 24/7 is another good choice.)
SKILL LEVEL Easy+
MEASUREMENTS
17” long x 11” wide x 11” high with 24-26” handles
(43 cm x 28 cm x 28 cm with 61-66 cm handles)
NOTES
The woven Alice Tote bag combines 4 different potholder loom designs. The four designs and how many squares of each you need are listed below.
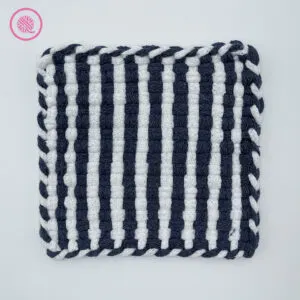
- Stripes: 11
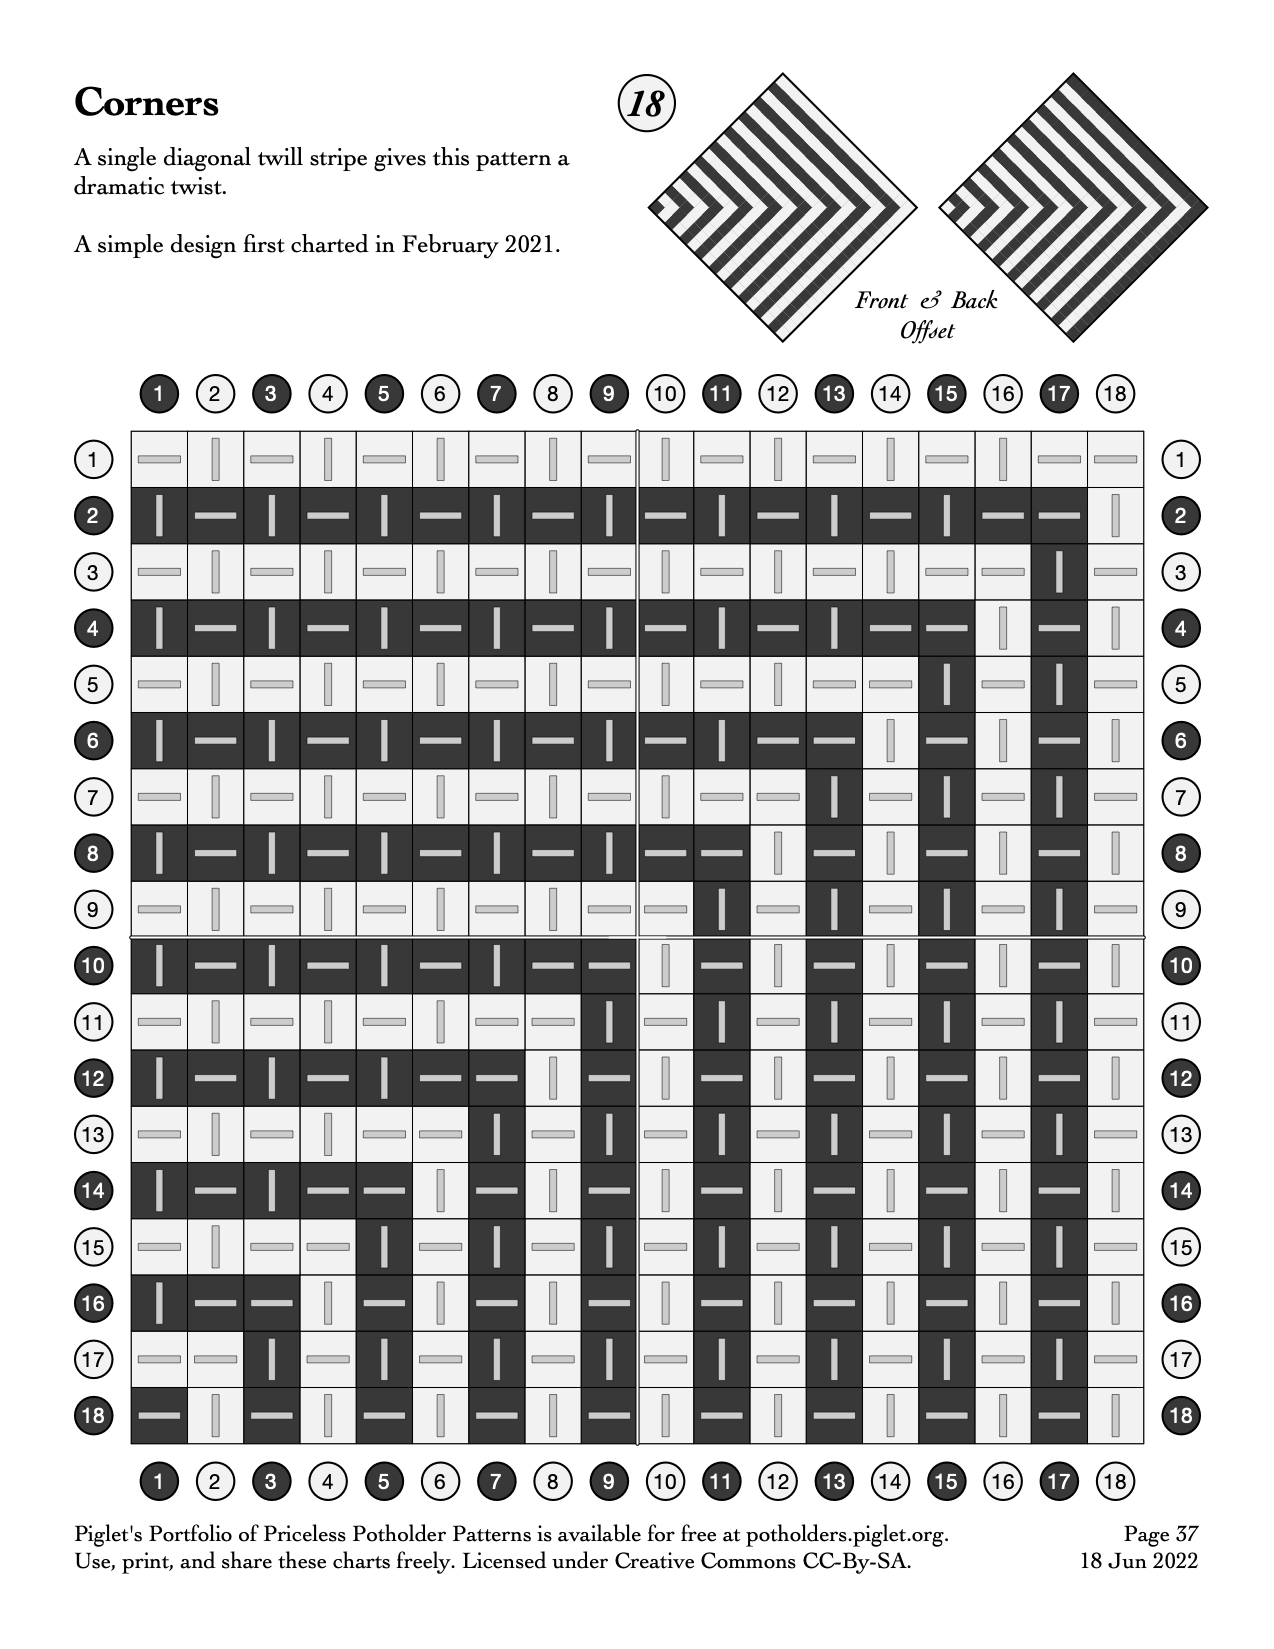
- Corners: 4
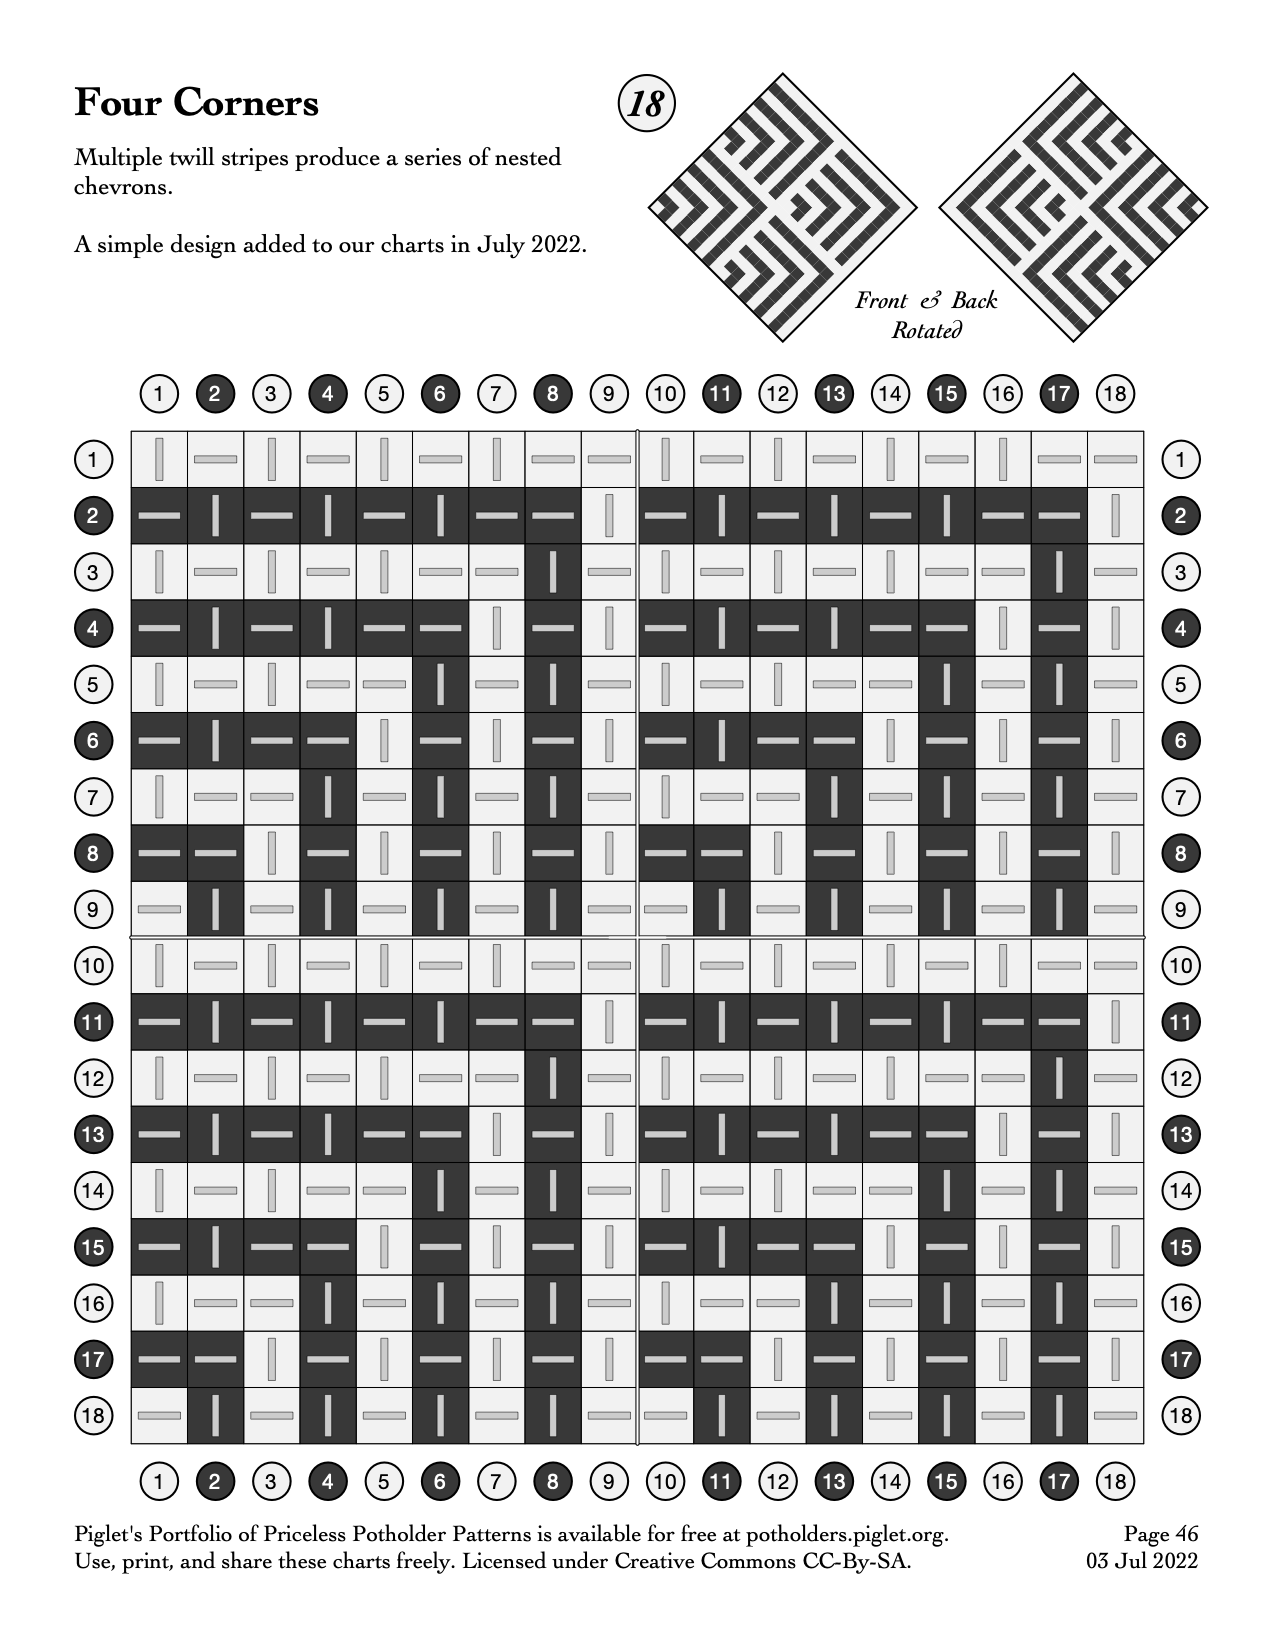
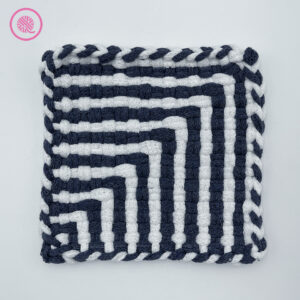
- Four Corners: 8
- Diverging Corners: 12 (6 in each color combination. Details below.)
When weaving the individual squares, place all the warp (vertical) loops on the potholder loom first. Then you weave the horizontal loops according to the row instructions.
In the row instructions for the squares below, directions written in parentheses ( ) are repeated. The number of times to work the repeat are listed after the parentheses.
You can find detailed weaving charts of each design at Piglets Potholders Patterns:
(Shared with permission under Creative Commons license CC-by-SA)
NOTE: Feel free to swap out any of my other potholder designs for some of the squares if you want to personalize your bag even more.
Back and Forth Twill Potholder
Christmas Plaid Potholder
Corners
Diverging Corners
Four Corners
Noughts and Crosses (X and O)
Padded Basketweave Potholder
Square Spiral Potholder
Twill Diamond Potholder
Two-Two Twill Chevron Potholder
Woven Potholders: 9 Basic Patterns
Zig Zag Twill Potholder
Step 1: Make the Squares & Handles
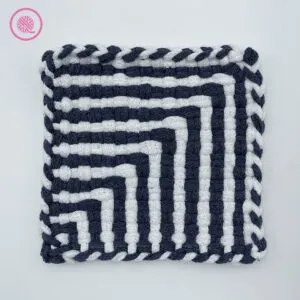
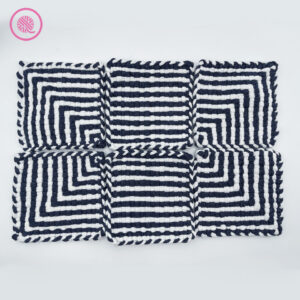
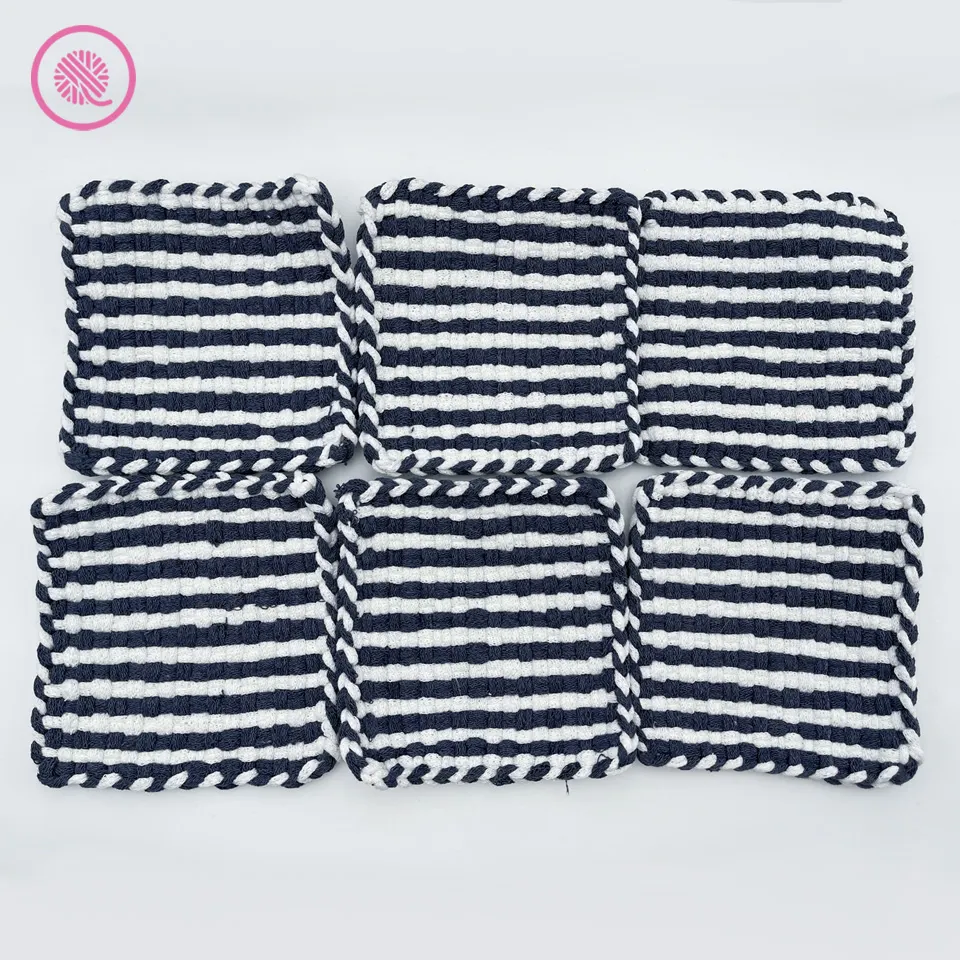
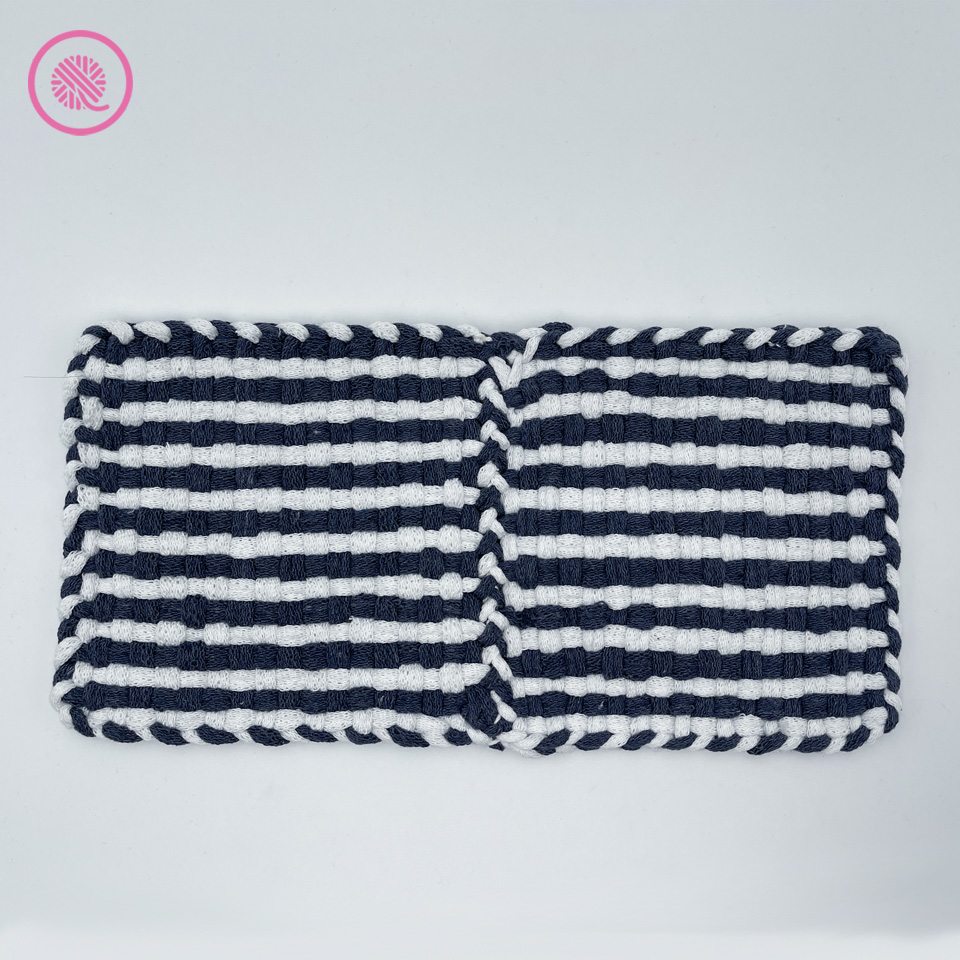
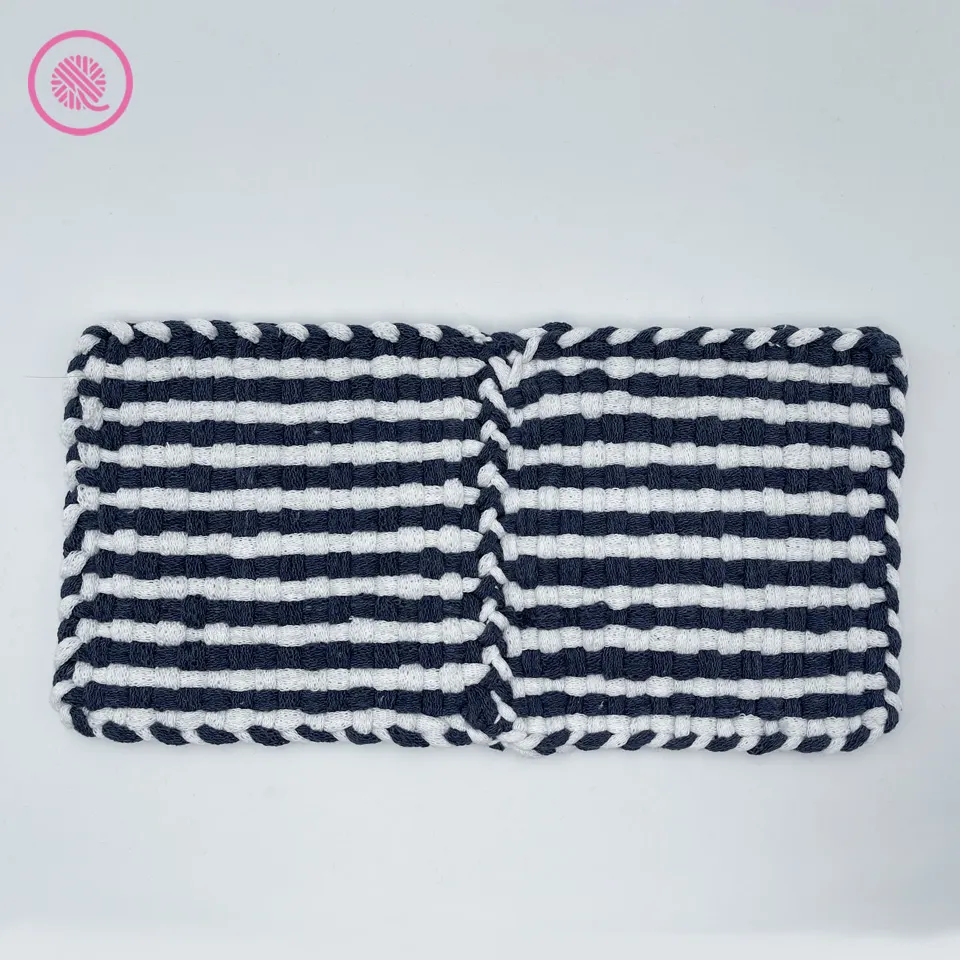
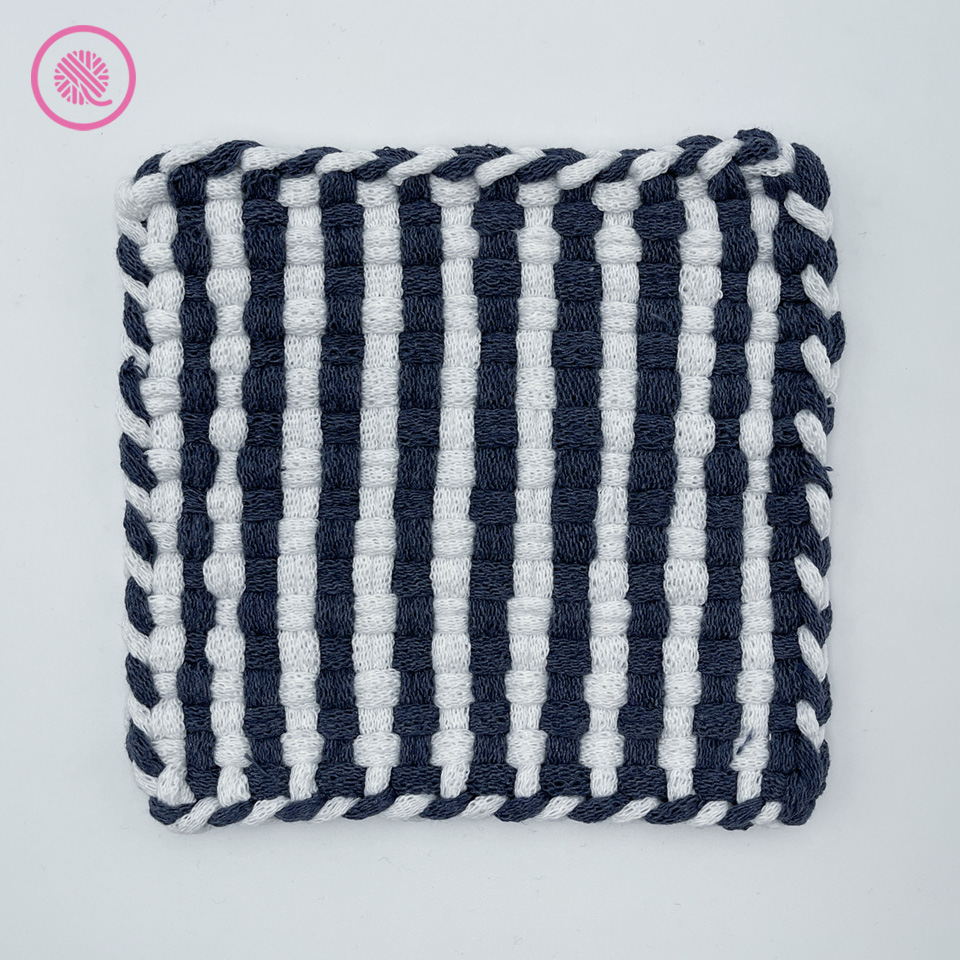
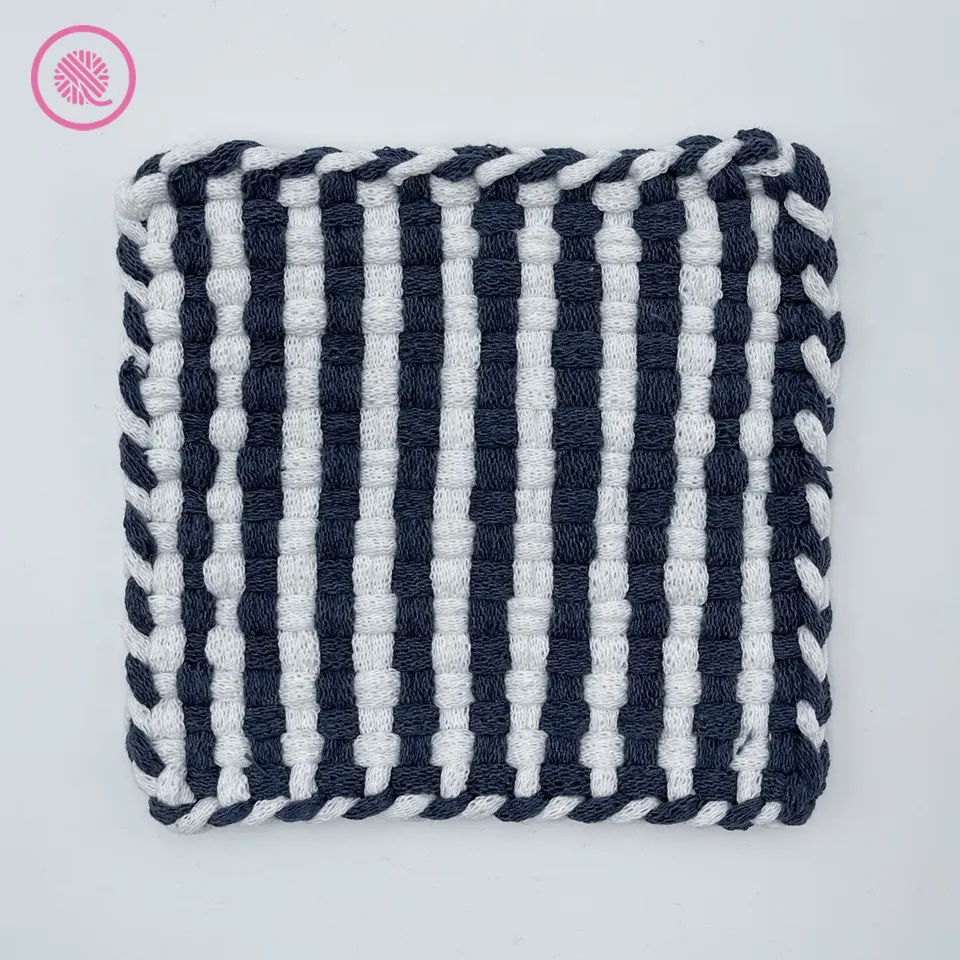
Square 1 – Stripes
Make 11
Each square will use the following loops:
Color A: White- 18 loops
Color B: Denim- 18 loops

TUTORIAL VIDEOS
These tutorial videos show the entire Stripes Potholder pattern from start to finish.
INSTRUCTIONS
Warp:
Place 18 loops vertically (from top to bottom) beginning with Color A and alternating with Color B.
Weave:
Row 1: With A, weave (over 1, under 1) 9 times.
Row 2: With B, weave (under 1, over 1) 9 times.
Rep Rows 1 and 2 8 more times.
Bind off using crochet hook.
Repeat above instructions until you have 11 squares.
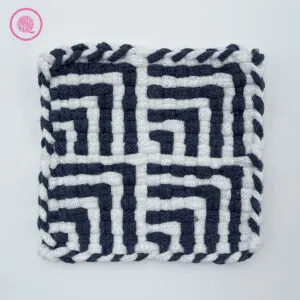
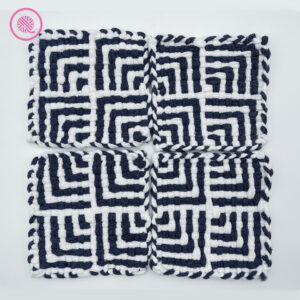
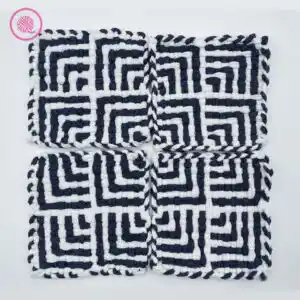
Square 2 – Corners
Make 4
Each square will use the following loops:
Color A: White- 18 loops
Color B: Denim- 18 loops
TUTORIAL VIDEOS
These tutorial videos show the entire Corners Potholder pattern from start to finish.
INSTRUCTIONS
Warp:
Place 18 loops vertically (from top to bottom) beginning with Color B and alternating with Color A.
Weave:
Row 1: With A, weave (over 1, under 1) 8 times. Weave over 2.
Row 2: With B, weave (under 1, over 1) 7 times. Weave under 1, over 2, under 1.
Row 3: With A, weave (over 1, under 1) 7 times. Weave over 2, under 1, over 1.
Row 4: With B, weave (under 1, over 1) 6 times. Weave under 1, over 2, under 1, over 1, under 1.
Row 5: With A, weave (over 1, under 1) 6 times. Weave over 2. Weave (under 1, over 1) 2 times.
Row 6: With B, weave (under 1, over 1) 5 times. Weave under 1, over 2, under 1. Weave (over 1, under 1) 2 times.
Row 7: With A, weave (over 1, under 1) 5 times. Weave over 2. Weave (under 1, over 1) 3 times.
Row 8: With B, weave (under 1, over 1) 4 times. Weave under 1, over 2, under 1. Weave (over 1, under 1) 3 times.
Row 9: With A, weave (over 1, under 1) 4 times. Weave over 2. Weave (under 1, over 1) 4 times.
Row 10: With B, weave (under 1, over 1) 3 times. Weave under 1, over 2, under 1. Weave (over 1, under 1) 4 times.
Row 11: With A, weave (over 1, under 1) 3 times. Weave over 2. Weave (under 1, over 1) 5 times.
Row 12: With B, weave (under 1, over 1) 2 times. Weave under 1, over 2, under 1. Weave (over 1, under 1) 5 times.
Row 13: With A, weave (over 1, under 1) 2 times. Weave over 2. Weave (under 1, over 1) 6 times.
Row 14: With B, weave under 1, over 1, under 1, over 2, under 1. Weave (over 1, under 1) 6 times.
Row 15: With A, weave over 1, under 1, over 2. Weave (under 1, over 1) 7 times.
Row 16: With B, weave under 1, over 2, under 1. Weave (over 1, under 1) 7 times.
Row 17: With A, weave over 2. Weave (under 1, over 1) 8 times.
Row 18: With B, (weave over 1, under 1) 9 times.
Bind off using crochet hook.
Repeat above instructions until you have 4 squares.
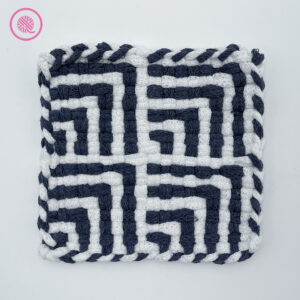
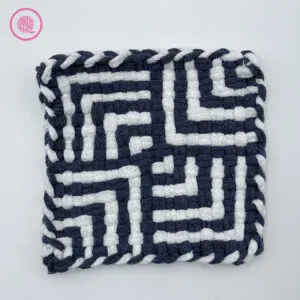
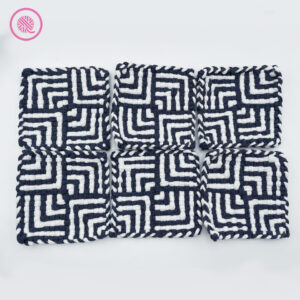
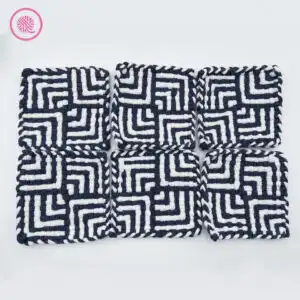
Square 3 – Four Corners
Make 8
Each square will use the following loops:
Color A: White- 20 loops
Color B: Denim- 16 loops
TUTORIAL VIDEOS
These tutorial videos show the entire Four Corners Potholder pattern from start to finish.
INSTRUCTIONS
Warp:
Place 18 loops vertically (from top to bottom) in the following order:
Pegs 1-8: Alternate Colors A and B. (A on the odd pegs, B on the even pegs.)
Pegs 9-10: Color A
Pegs 11-18: Alternate Colors B and A (B on the odd pegs, A on the even.)
Weave:
Row 1: With A, *weave (under 1, over 1) 3 times. Weave under 1, over 2. Repeat from * to end of row.
Row 2: With B, *weave (over 1, under 1) 3 times. Weave over 2, under 1. Repeat from * to end of row.
Row 3: With A,*weave (under 1, over 1) 2 times. Weave under 1, over 2, under 1, over 1. Repeat from * to end of row.
Row 4: With B, *weave (over 1, under 1) 2 times. Weave over 2, under 1, over 1, under 1. Repeat from * to end of row.
Row 5: With A, *weave under 1, over 1, under 1, over 2. Weave (under 1, over 1) 2 times. Repeat from * to end of row.
Row 6: With B, *weave over 1, under 1, over 2, under 1. Weave (over 1, under 1) 2 times. Repeat from * to end of row.
Row 7: With A, *weave under 1, over 2. Weave (under 1, over 1) 3 times. Repeat from * to end of row.
Row 8: With B, *weave over 2, under 1. Weave (over 1, under 1) 3 times. Repeat from * to end of row.
Row 9: With A, weave (over 1, under 1) 4 times. Weave over 2. Weave (under 1, over 1) 4 times.
Rows 10-18: Rep Rows 1-9 once more.
Bind off using crochet hook.
Repeat above instructions until you have 8 squares.
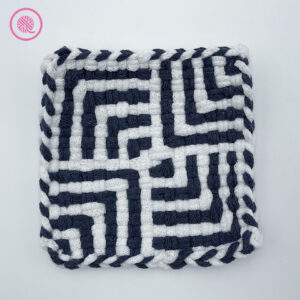
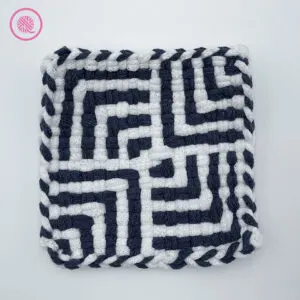
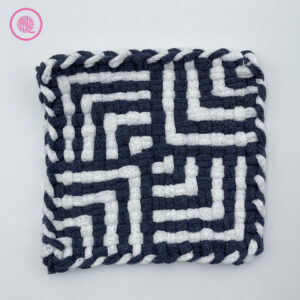
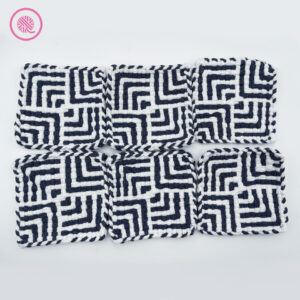
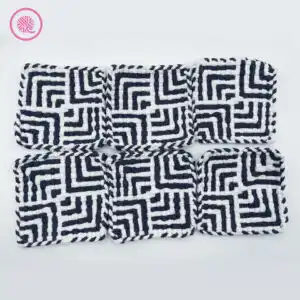
Square 4 – Diverging Corners
This design uses 2 different color combinations. The first one uses White as Color A and the other uses Denim as Color A.
Make 12 (6 of each color combination)
Combination 1 uses the following loops in each square:
Color A: White- 20 loops
Color B: Denim- 16 loops
Combination 2 uses the following loops in each square:
Color A: Denim- 20 loops
Color B: White- 16 loops
TUTORIAL VIDEOS
These tutorial videos show the entire Diverging Corners Potholder pattern from start to finish.
INSTRUCTIONS
Warp:
Place 18 loops vertically (from top to bottom) in the following order:
Pegs 1-8: Alternate Colors A and B. (A on the odd pegs, B on the even pegs.)
Pegs 9-10: Color A
Pegs 11-18: Alternate Colors B and A (B on the odd pegs, A on the even.)
Weave:
Row 1: With A, weave (under 1, over 1) 9 times.
Row 2: With B, weave under 2. Weave (over 1, under 1) 7 times. Weave over 2.
Row 3: With A, weave over 1 under 2. Weave (over 1, under 1) 6 times. Weave over 2, under 1.
Row 4: With B, weave under 1, over 1, under 2. Weave (over 1, under 1) 5 times. Weave over 2, under 1, over 1.
Row 5: With A, weave over 1, under 1, over 1, under 2. Weave (over 1, under 1) 4 times. Weave over 2, under 1, over 1, under 1.
Row 6: With B, weave (under 1, over 1) 2 times. Weave under 2. Weave (over 1, under 1) 3 times. Weave over 2. Weave (under 1, over 1) 2 times.
Row 7: With A, weave (over 1, under 1) 2 times. Weave over 1, under 2. Weave (over 1, under 1) 2 times. Weave over 2. Weave (under 1, over 1) 2 times. Weave under 1.
Row 8: With B, weave (under 1, over 1) 3 times. Weave under 2, over 1, under 1, over 2. Weave (under 1, over 1) 3 times.
Row 9: With A, weave (over 1, under 1) 3 times. Weave over 1, under 2, over 2, under 1. Weave (over 1, under 1) 3 times.
Row 10: With A, weave (under 1, over 1) 3 times. Weave under 1, over 2, under 2, over 1. Weave (under 1, over 1) 3 times.
Row 11: With B, weave (over 1, under 1) 3 times. Weave over 2, under 1, over 1, under 2. Weave (over 1, under 1) 3 times.
Row 12: With A, weave (under 1, over 1) 2 times. Weave under 1 over 2. Weave (under 1, over 1) 2 times. Weave under 2, over 1. Weave (under 1, over 1) 2 times.
Row 13: With B, weave (over 1, under 1) 2 times. Weave over 2. Weave (under 1, over 1) 3 times. Weave under 2. Weave (over 1, under 1) 2 times.
Row 14, With A, weave under 1, over 1, under 1, over 2. Weave (under 1, over 1) 4 times. Weave under 2, over 1, under 1, over 1.
Row 15: With B, weave over 1, under 1, over 2. Weave (under 1, over 1) 5 times. Weave under 2, over 1, under 1.
Row 16, With A, weave under 1, over 2. Weave (under 1, over 1) 6 times. Weave under 2, over 1.
Row 17: With B, weave over 2. Weave (under 1, over 1) 7 times. Weave under 2.
Row 18: With A, weave (over 1, under 1) 9 times.
Bind off using crochet hook.
Repeat above instructions until you have 6 squares with White as the main color and 6 squares with Denim as the main color.
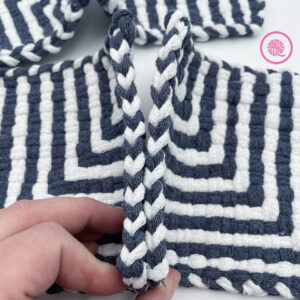
Handles
Make 2
You will need 25-30 loops in Color B (Denim) per handle.
TUTORIAL VIDEO
The following video demonstrates how to make the braided handles. This video is essential to learning the process. The basic steps are outlined below.
INSTRUCTIONS
- Begin by linking 5-6 loops together.
- Repeat Step 1 until you have 5 separate strands of loops.
- Line up the strands to you can put your finger through 5 loops at one end. Make sure the strand are not twisted.
- Attach the strands to a swivel hook by pushing all 5 loops through the base of the swivel hook. Then pull the loops up and over the top of the hook. Tug the strands to tighten.
- Secure the swivel hook to a loom or other stationary object so it won’t move while you’re braiding. Fan out the strands in front of you so they are separated and untangled.
- Work a 5-strand braid in the following manner:
- Pick up the strand on the RIGHT and bring it over the next 2 strands to the middle.
- Pick up the strand on the LEFT and bring it over the 2 strands to the middle.
- Continue these two steps tightening your braid as you go.
- When you have about 1.5″ left to braid, attach the next swivel hook the same way you did the first one.
Repeat steps above until you have 2 handles.
Step 2: Assemble the Woven Alice Tote Bag
NOTES
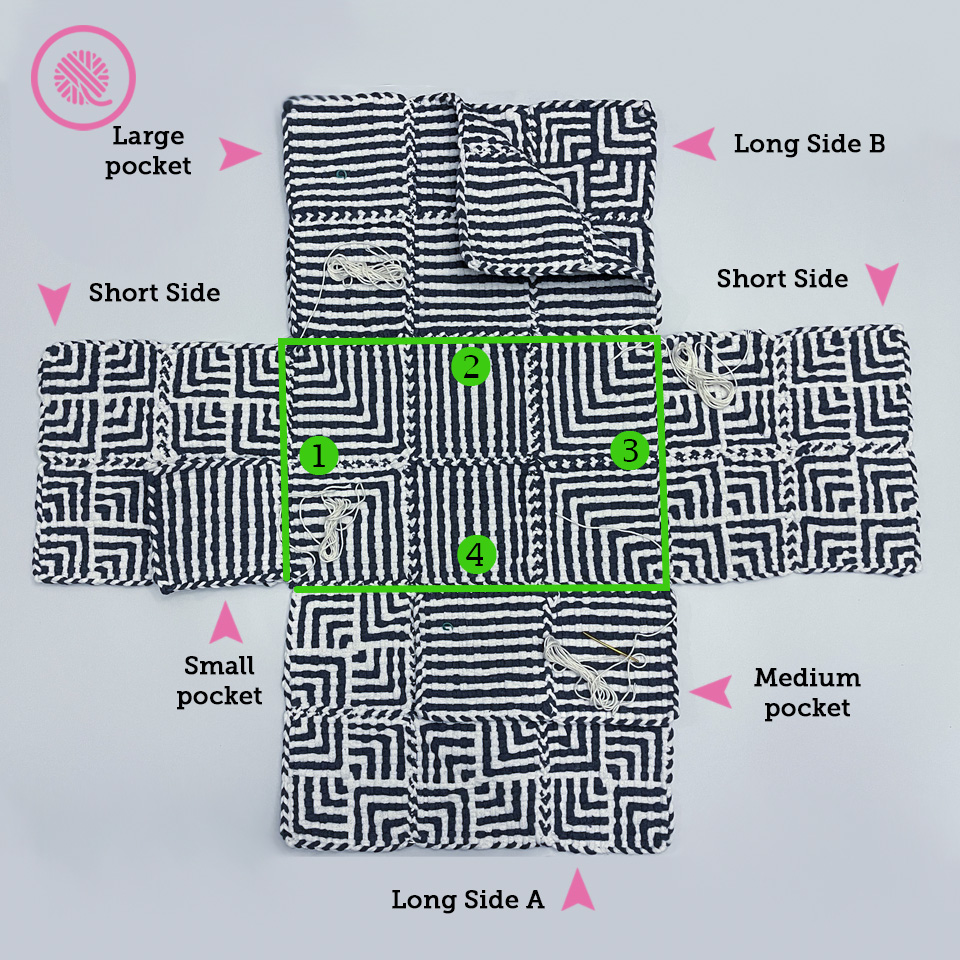
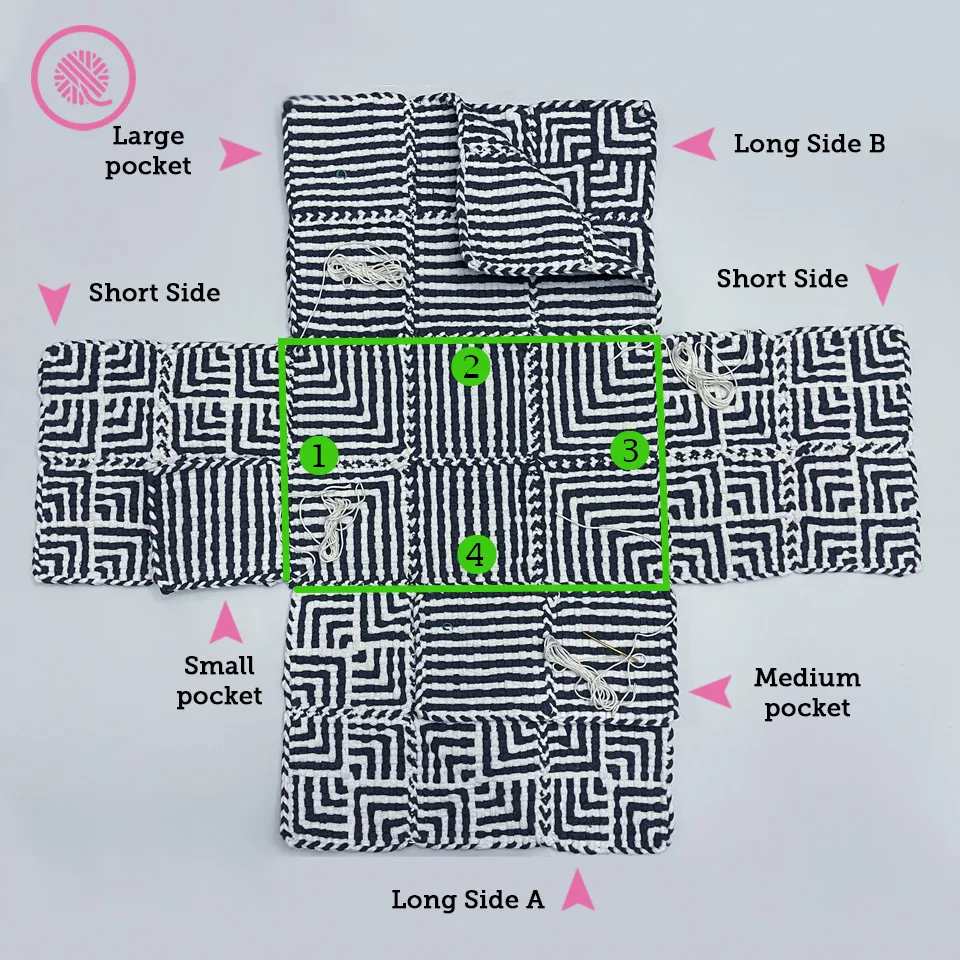
You will arrange and seam all the squares you made into the following parts of the bag:
- Short sides (ends)
- Long side A
- Long side B
- Bottom
- Large interior pocket
- Medium interior pocket
Then you will seam these parts to create the finished bag.
TIP: Some of the squares are fully reversible, but others are not. You may need to flip or rotate your squares to line them up correctly. I included pictures of each assembled part to help you. Please double check the direction each individual square is facing before you seam.

Seams: The outer edge of the potholder shows a line of “V” shaped stitches. You sew the seams through only one side of the V. On some parts of the bag you flip it over and seam it on the other side as well. But, pay close attention because there are some seams that you only work on one side.
For each seam, you will need enough yarn to measure 3x the length of the seam.
I recommend using locking stitch markers to mark the right side* of each part of the bag. This will make it easier during assembly to make sure your pieces are facing the correct way.
*The right side of the outer pieces will be on the outside of the bag.
TUTORIAL VIDEOS
These videos demonstrate how to assemble the Alice Tote Bag using all the squares and handles you made. There are both right and left handed versions so you can see the techniques from the proper perspective.
Seam the main parts of the bag:
- Short Sides (ends)
(Make 2)
Squares needed:
4 – Four Corners design for each short side.
2. Long side A (front)
(Make 1)
Squares needed:
6 – Diverging Corners with White as Main Color
3. Long side B (back)
(Make 1)
Squares needed:
6 – Diverging Corners with Denim as Main Color
4. Bottom
(Make 1)
Squares needed:
4 – Corners and 2 – Stripes

- Large interior pocket
(Make 1)Squares needed: 6 – Stripes

6. Medium interior pocket
(Make 1)
Squares needed:
2 – Stripes
7. Small interior pocket
You have 1 Stripes square left. This last square will be used as a small interior pocket.
Mark the right side of each piece with a locking stitch marker. (optional)
Assemble the Parts
Use the following image as a guide for assembling your bag. The individual steps are listed below. The Bottom Seams are shown in green and numbered in order. NOTE: The bottom and sides are seamed with the right side facing down. The pockets are seamed right side facing up.
Bottom Seam 1 (Bottom to Short side + small pocket):
- Lay the bottom of the bag in front of you with the right side facing downward.
- Line up one of the short sides right side down along one end of the bottom.
- Place the small interior pocket on top of the short side. The pocket should fully cover one of the squares and line up with the edge where the side and bottom pieces meet.
- Cut enough yarn to seam across the bottom edge and up the short side. (You will not seam up the side in this step. The extra yarn is used later.)
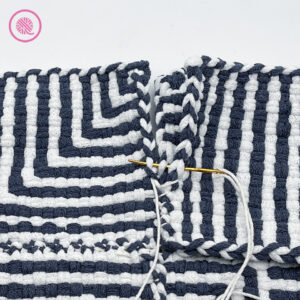
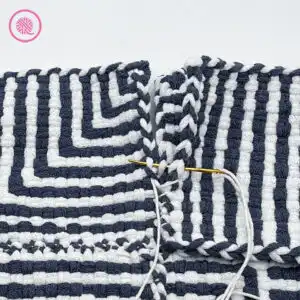
- Sew the side to the bottom as before. When you get to the pocket, sew through BOTH legs of the V stitch on the pocket then one leg of the side and one leg of the bottom stitches. (See image below.)
- When you finish the seam, do NOT flip over. Leave the remaining yarn for finishing later.
Bottom Seam 2 (Bottom to Long side B + large pocket):
- Rotate bottom of bag then lay long side B right side down along the edge.
- Lay the large interior pocket on top of the side.
- Cut enough yarn to seam across the bottom edge and up the short side. (You will not seam up the side in this step. The extra yarn is used later.)
- Seam through all layers you did with the small pocket and side.
- When you finish the seam, do NOT flip over. Leave the remaining yarn for finishing later.
Bottom Seam 3 (Bottom to Short side):
- Lay the bottom of the bag in front of you with the right side facing downward.
- Line up one of the short sides face down along one end of the bottom.
- Cut enough yarn to seam across the bottom edge and up the short side. (You will not seam up the side in this step. The extra yarn is used later.)
- Sew the side to the bottom as before.
- When you finish the seam, do NOT flip over. Leave the remaining yarn for finishing later.
Bottom Seam 4 (Bottom to Long side A + medium pocket):
- Rotate bottom of bag then lay long side A right side down along the last edge.
- Lay the medium interior pocket on top of the sidelinging up the long edge of the pocket along the bottom seam.
- Cut enough yarn to seam across the bottom edge and up the short side. (You will not seam up the side in this step. The extra yarn is used later.)
- Seam through all layers you did with the small pocket and side.
- When you finish the seam, do NOT flip over. Leave the remaining yarn for finishing later.
Side Seams (4)
The four remaining seams are sewn beginning on the inside of the bag using the remaining yarn from the bottom seams.
- Begin at the bottom corner on the inside of the bag where a long side and short side meet.
- Sew the seam as before going through all layers including pockets.
- When you finish this seam, continue on the outside of the bag. Go back down the side seam and across the bottom seam to reinforce it.
- Weave in all ends.
Repeat these steps on all side seams.
Interior Pocket Seams
Sew the loose edges of the small and medium pockets to the edges of the squares on the inside of the bag. Weave in all ends.
Clip on the handles and head to the beach. You’ve earned it!
PIN IT!

MarissaB
Saturday 6th of July 2024
What a lovely use of woven potholders! Thanks for the pattern, Kristen. I will be making this.
Jeannette Pirkle
Saturday 6th of July 2024
Kristen, I love this bag in your mom’s memory. ❤️I just watched the videos and think this is sooo cool. You had to put so much time into the tutorial. It is so clear. Thank you for an awesome pattern. ?