Inside: Free pattern for the crochet Pie Carrier including written instructions and videos. This handy thermal tote fits a pie plate or casserole dish.
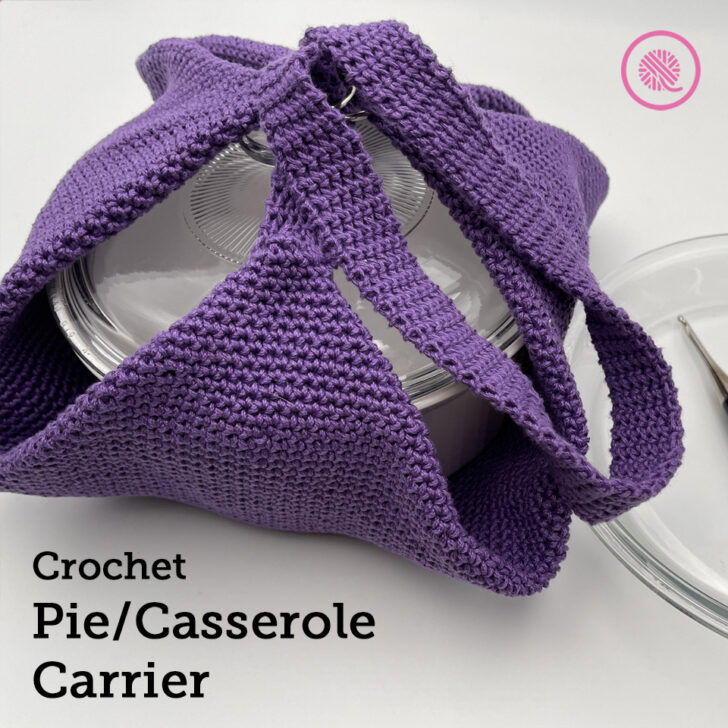
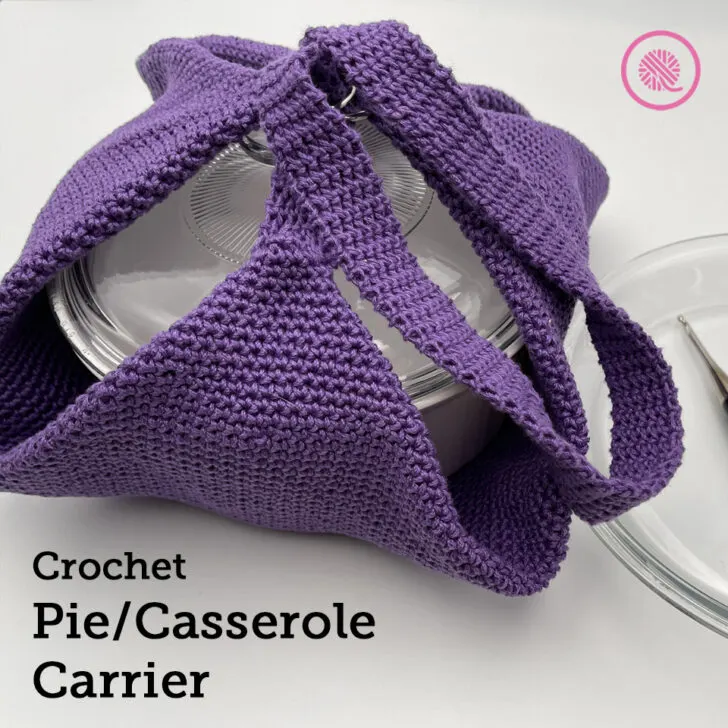
The crochet Pie/Casserole Carrier is a must for your next outing!
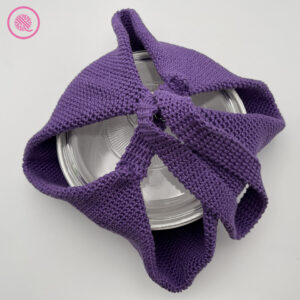
This handy cotton tote fits a large pie plate or casserole dish and the attached handle slides through the rings at the corners to close. It uses mercerized cotton, so it’s fully heat-proof and washable.

The pattern includes written instructions and fully-captioned tutorial videos showing you how to crochet the base and handle and how to assemble the carrier.
Crochet Pie Carrier
By Kristen Mangus
An ad-free downloadable PDF of this pattern is available for purchase in my GoodKnit Kisses online store, Etsy or Ravelry at the links below:


MATERIALS
(Materials list may contain affiliate links to products I used to make this project. Using these links cost you nothing, but helps support GKK.)
Yarn
Medium (#4) weight yarn mercerized cotton
Lion Brand 24/7 Cotton (186 yds./3.5 oz. (170 m /100g) in color Purple used in sample, 4 balls
Hook
US Size G-7 (4.5 mm) hook
Furls Crochet Odyssey in Black & Nickel (G+) used in sample.
Notions:
Locking stitch marker for beginning of each round
Tapestry needle
2 – 1” D rings
ABBREVIATIONS
ch = chain
Sc = single crochet
Tsc = thermal single crochet
st(s) = stitch(es)
If you need a refresher, be sure to check out my How to Crochet series!
GAUGE
Base: 17.5 sts x 21 rows in 4” (10 cm) in single crochet st
Handle: 19 sts x 36 rows in 4” (10 cm) in thermal single crochet stitch
SKILL LEVEL Easy+
MEASUREMENTS Approx 16” x 16” (40 cm x 40 cm)
NOTES
This project uses 1 square as the base for the carrier. You crochet the base in the round to create a double layer square. The handle is crocheted using the thermal single crochet stitch. Then the handle and 2 D rings are sewn onto the corners to complete the project. (See notes below for creating a thinner, single layer base.)
Crochet Pie Carrier Base
NOTES
To resize the base of the carrier, lengthen or shorten your beginning chain to any odd number. Working an even number of chains will cause the stitch pattern to look slightly different.
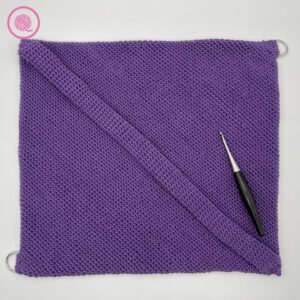
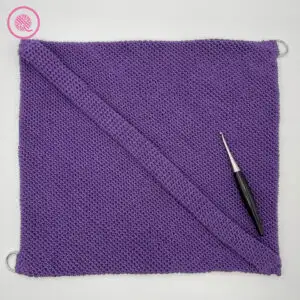
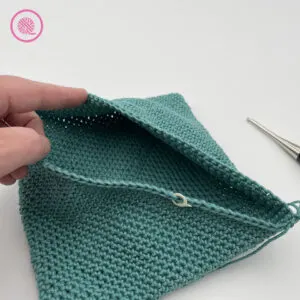
After the foundation round, this project is crocheted continuously in the round. You work until your piece measures half the length of your starting chain, then flatten the rectangle across the diagonal to form a square (see images below). Weave in tails from added yarn. Lastly, slip stitch the center diagonal to seam. Lastly, sew 2 D-ring loops at opposite corners, crochet a handle and sew at last two corners.
Single crochet (Sc):
Insert hook through loop(s) of the next st, YARNOVER and pull up a loop. YARNOVER and pull through both loops.
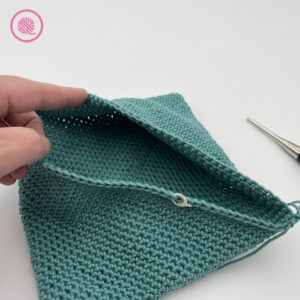
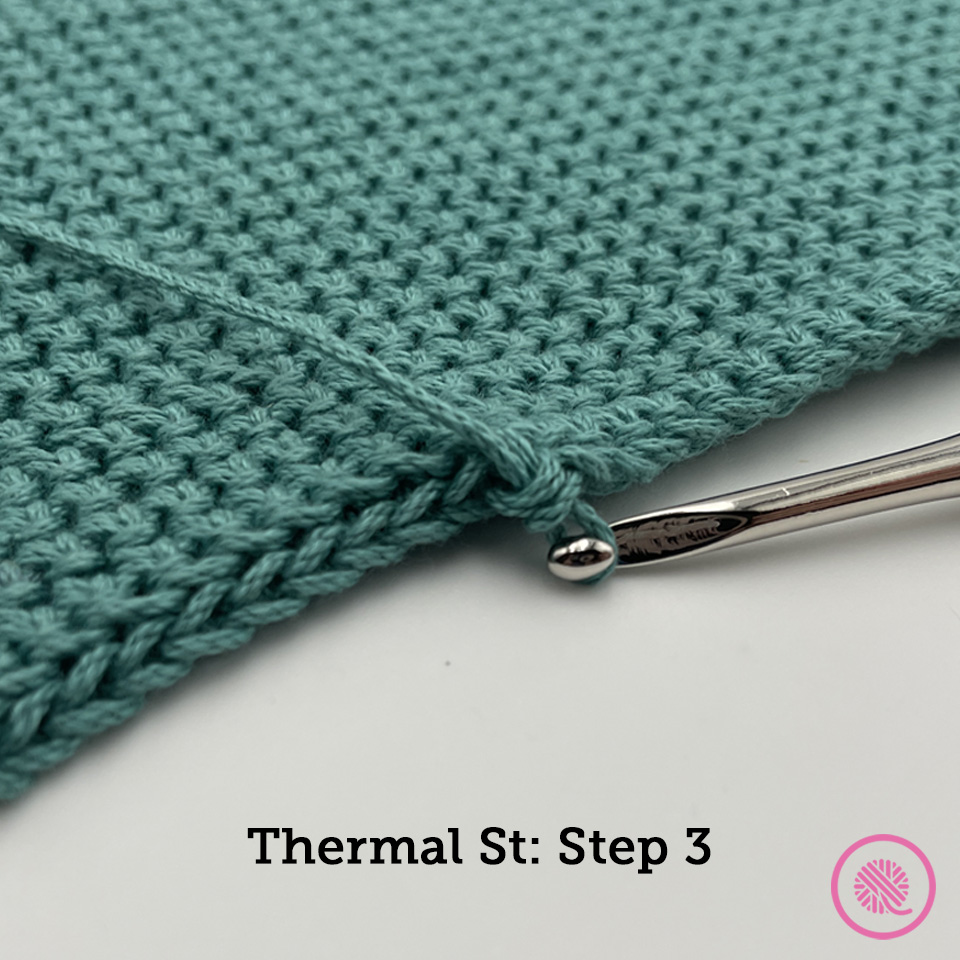
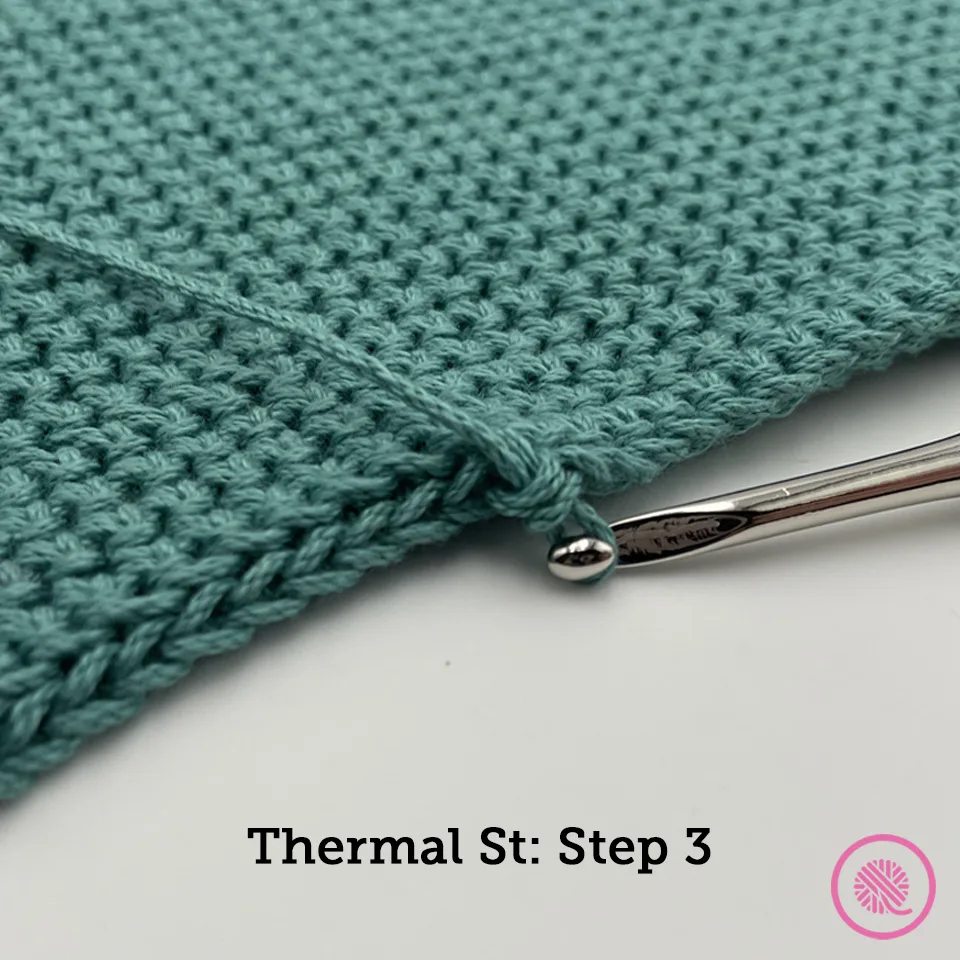
Shaping the base: This project uses a unique fold. You are crocheting a rectangular pocket and folding it into a square. The bottom two corners of your piece form two opposite corners of the square. Your ending stitch (with the crochet hook in the first image below) and the stitch on the opposite side of the round make the other two corners. Pick up your piece and stand it up with the cast on edge on the table. Open the pocket by pulling the center of both the front and back away from each other. As you pull the centers down toward the table the edges will meet in the middle across the diagonal of your square. Flatten the square and adjust corner points by hand before seaming.
Variations: I worked all my single crochet sts in the usual way, but you can work through the back loop only or alternate working through back and front loops for a different look.
Single Layer Base (optional): You can also crochet the base using the same thermal stitch pattern used in the handle. This creates a strong, dense fabric, but is thinner than the double layer base. Make the foundation chain the desired width of your base, crochet until desired length and fasten off.
Base Instructions
(Make 1.)
Chain 97.
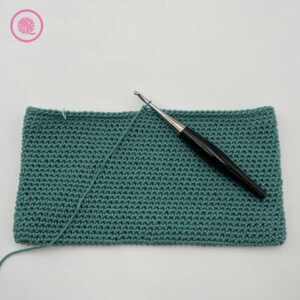
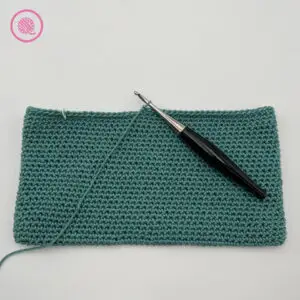
Foundation Round: Sc into second chain from the hook in the first loop. Sc across until 1 stitch remains. 3 Sc in last st. [98 sts] Do not turn over but rotate and sc in the next chain making sure to go through both loops. Sc across until 1 stitch remains. 3 Sc in last st. [196 sts]
Round 1: Sc in next stitch and mark top of st with locking stitch marker. This marks the beginning of the round. Sc across remaining sts. Do not join the round or turn.
Repeat Round 1 until piece measures half the length of the starting chain (approx. 11” or 54 rounds). Finish your final round about halfway across one side.
Check to see if your piece can fold into a perfect square. First, if your edges don’t meet in the center, crochet 1 more round. Next, If your ending stitch isn’t at the corner, add or remove stitches until your working loop is exactly at a corner.
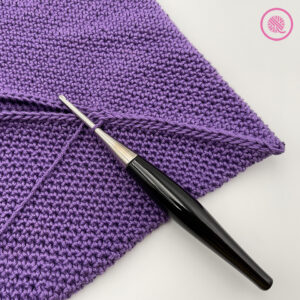
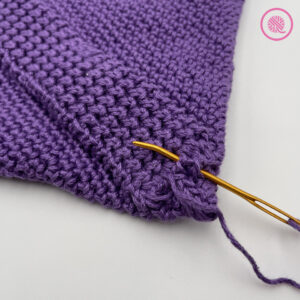
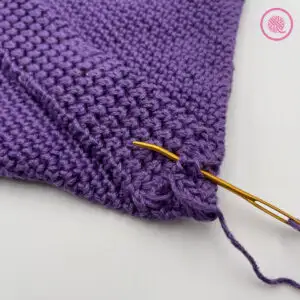
To Join:
Beginning at the corner, slip stitch seam together by inserting hook into the back loop of one side and the back loop of the other side, YARNOVER and pull through all loops. Continue slip stitching both sides together until you reach opposite corner. Cut yarn, fasten off and weave tail.

Tutorial Videos
Select videos are available to GoodKnit Kisses YouTube members only. To get exclusive access to GKK VIP-only content, free PDF patterns, weekly Zoom meetup and more, sign in to YouTube and join as a VIP Member today! Find out more about GKK Membership HERE!
Right handed
Left handed
Crochet Pie Carrier Handle
NOTES:
The beginning of the thermal stitch can be a bit fiddly until you’ve worked several rows. I recommend practicing the stitch by making a swatch of 12-20 stitches first before working on your project.
TIP: Crochet the first chain and first row loosely to clearly see placement of stitches. Also count your stitches at the end of each row to make sure you aren’t skipping the last stitch. The last stitch can be tight so it is easy to miss.
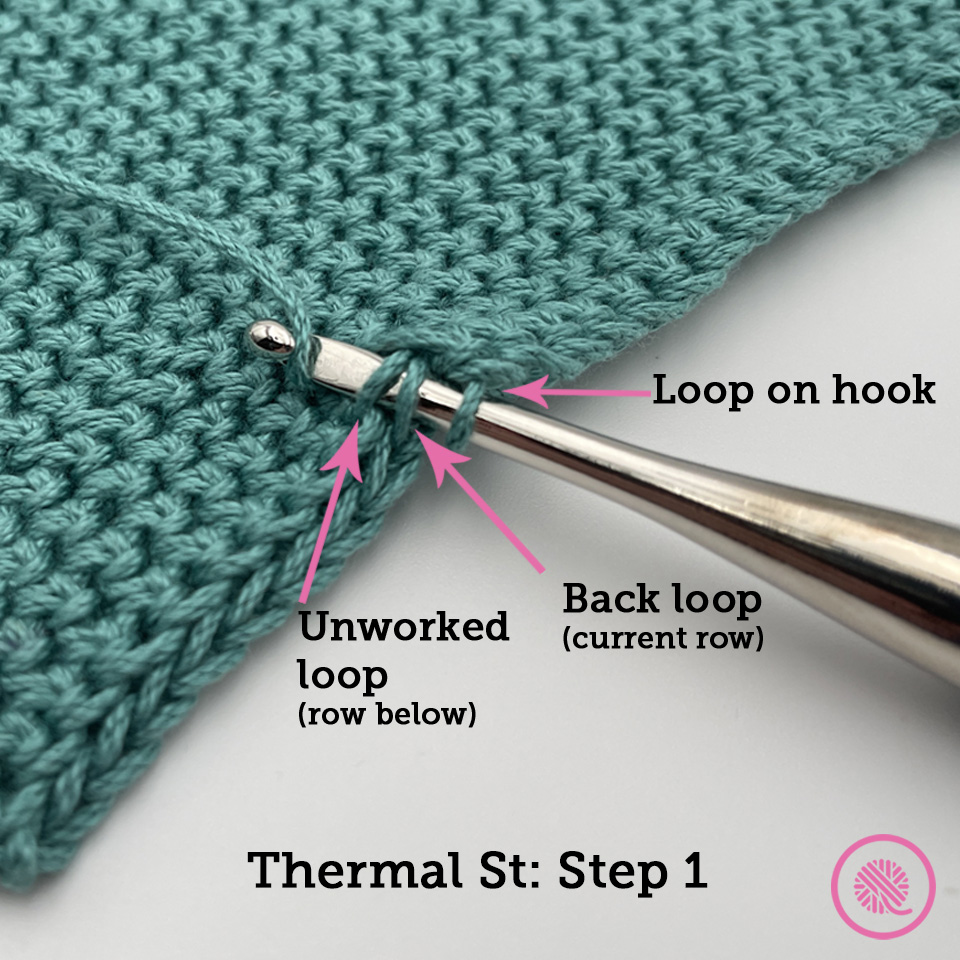
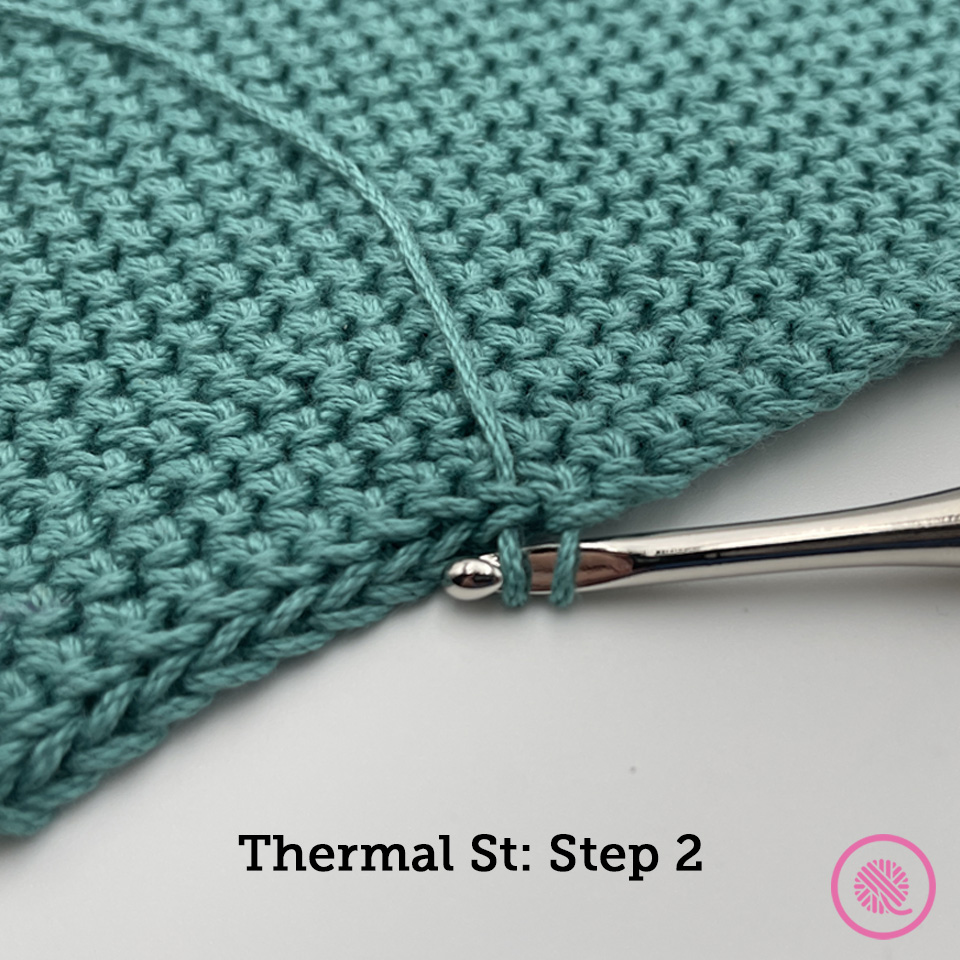
Thermal single crochet (Tsc):
- Insert hook through BACK LOOP of the next single crochet st and the UNWORKED LOOP from the ROW BELOW (3 loops on hook).
- Yarn over and pull up a loop through the first 2 loops on hook. TIP: Make sure the yarnover loop is pulled up to height of a full sc).
- Yarn over and pull through both loops on the hook.
- Working the row on both the right and wrong side completes the thermal stitch.


Handle Instructions:
(Make 1)
Chain 7.
Thermal Foundation Row: Sc into second chain from the hook in the BACK LOOP only. Sc in the back loop in next chain to end of row. [6 sts]
Row 1: Ch1, turn, Tsc in next st to end of row.
Repeat Row 1 until piece measures 21.5” or until desired length (same as diagonal on square”).
Final row: Ch1, turn, insert hook through BOTH loops of the next st AND the UNWORKED loop from the row below (under all three loops), yarn over and pull up a loop, yarn over and pull through both loops on the hook to single crochet. Single crochet through both loops of next st and unworked loop from row below to end of row.
Cut yarn, pull loop through and weave in ends.
Tutorial Videos
Right handed
Left handed
Crochet Pie Carrier Assembly
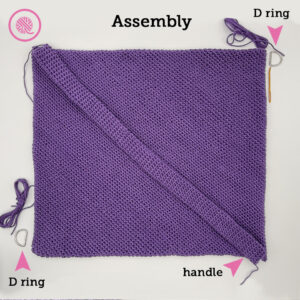
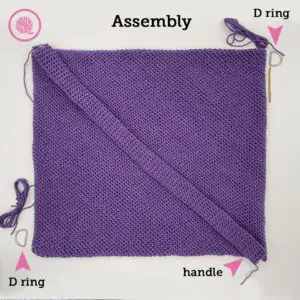
Lay handle diagonally across center of your base. Sew the ends of the handle to opposite corners. Be sure to seam across the corner as shown below.
across the corner.
Sew the two 1-inch D rings onto the side edges at opposite corners. Weave in tails.