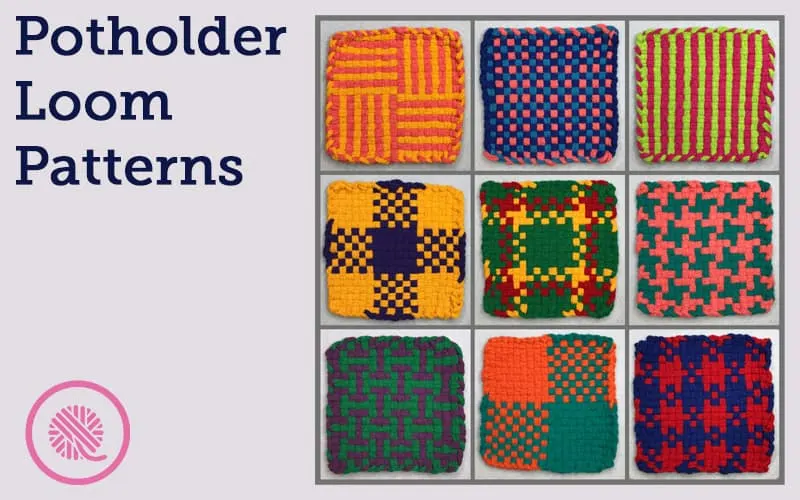
Inside: 9 woven hot pad patterns with easy-to-follow photos and video.
Remember that Christmas you got a potholder loom from your aunt?
You grabbed those stretchy fabric loops and started weaving. (Okay, in all honestly, that was after shooting the loops all around the living room until Mom made you stop, right?)
My potholders were all a random mish mash of colors. It was all about the weaving and not much about the hot pad.
Who knew you could PLAN a design on those? I sure didn’t.
Fast forward to now. CinDWood Looms started making hot pad looms. With a sturdy base and long nylon pegs it was much easier to use that the metal version I had as a kid. I started to experiment with colors and patterns.
The result is the 9 woven hot pad patterns I have for you today!
Woven Hot Pad Supplies List:
Products listed below may contain affiliate links. Using these links costs you nothing, but helps support GKK.
Hot Pad/Potholder Weaving Loom (CinDWood 10” Hot Pad Loom used in samples.)
Cotton Loops to fit your loom (CinDWood large hot pad loops used in samples. Harrisville Loops are another good option.)
Weaving tool (optional, I use my fingers)
Crochet hook (to bind off)
How to Weave a Potholder:
- Place the vertical loops first. The loops that run from top to bottom on the loom are called the warp.
- Begin with the first peg on the left.
- Place the loop around the first pegs at the top and bottom of your loom. (Be careful not to twist the loop.)
- Continue placing all the warp loops according the to the color pattern shown in the picture.
- Next begin weaving the horizontal loops through the warp. The loops that you weave across your loom are called the weft.
- Begin with the top row by placing the end of the loop around the peg.
- Weave the loop by going over both strands of each warp loop then under both strands of the next loop. Continue weaving over and under until you reach the end the place the loop over the peg.
- On the next row begin weaving the loop under the warp loop then weave over the next one.Contin-ue weaving under then over to the end.
- On the odd numbered rows weave over then under.
- On the even numbered rows weave under then over.
- Continue weaving all the hoizontal loops according to the color pattern shown in the picture.
- To finish off your potholder, use a crochet hook to remove one loop from the beginning of a row.
- Pick up the next loop with the crochet hook and pull the first loop over the second and off the hook.
- Repeat Step 13 working loop by loop around your loom.
- When all loops are off the loom remove the last loop from the crochet hook and weave in to pot-holder.
Now that we’ve reviewed the basics let’s get started!
9 Woven Hot Pad Patterns
1. Pinstripe (2-color)
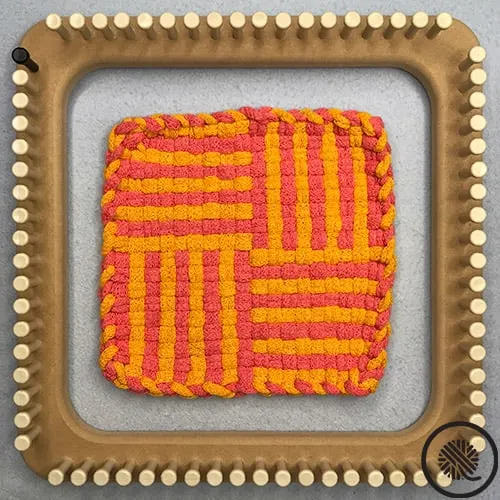
The Pinstripe potholder uses two colors and creates a striking design. The mini striped blocks that alternate direction remind me of log cabin quilt.
Cotton loops needed:
Color 1 (pink) – 18
Color 2 (yellow) – 18
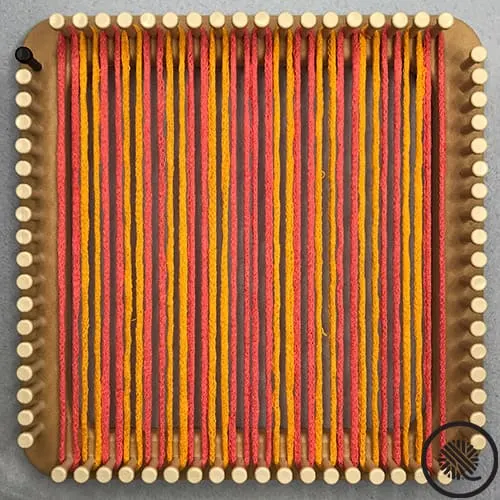
Pinstripe Warp Color Sequence:
- Alternate Color 1 then Color 2 on the first 8 pegs.
- Place Color 1 for Pegs 9-10.
- Alternate Color 2 then Color 1 for the last 8 pegs.
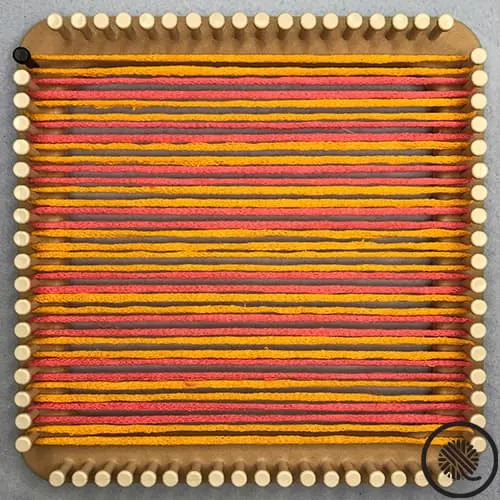
Pinstripe Weave Color Sequence:
- Alternate Color 2 then Color 1 on the first 8 pegs.
- Weave Color 2 for Pegs 9-10.
- Alternate Color 1 then Color 2 on the last 8 pegs.
2. Small Plaid (3-color)
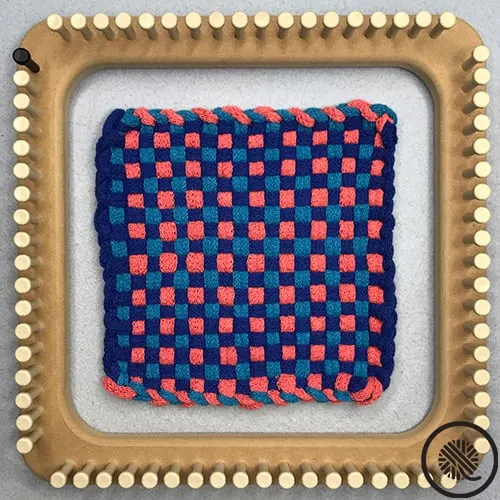
The Small Plaid design uses 3 colors, but it’s super easy to make! This is the one you want to make BUFFALO PLAID!!
Cotton Loops needed:
Color 1 (light blue) – 9
Color 2 (pink) – 9
Color 3 (dark blue) – 18
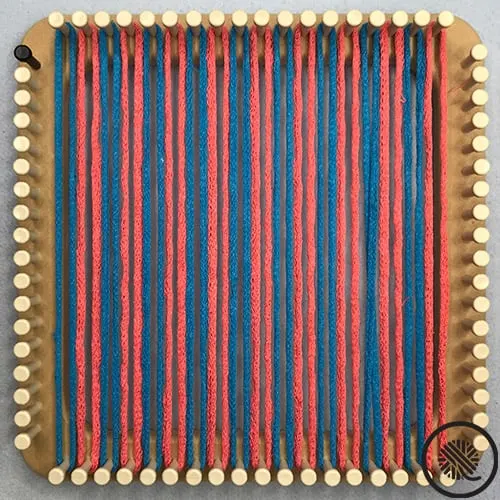
Small Plaid Warp Color Sequence:
Alternate Color 1 then Color 2 for all pegs.
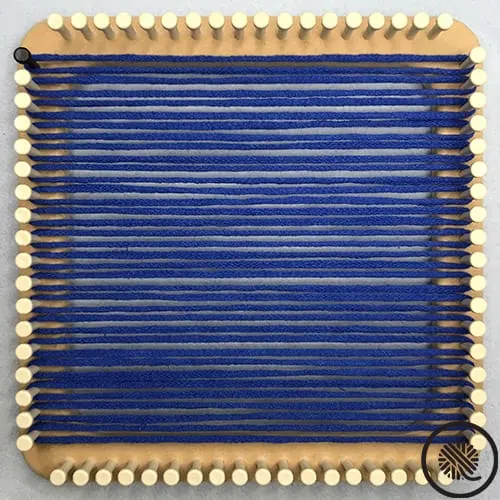
Small Plaid Weave Color Sequence:
Weave all with Color 3.
3. Striped (2-color)
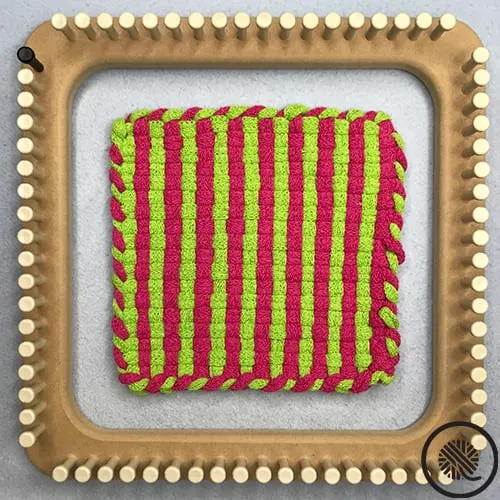
Stripes are simple. Choosing bold contrasting colors can make them pop while using similar shades of the same color creates a subtle design. Stripes are always in!
Cotton Loops needed:
Color 1 (lime green) – 18
Color 2 (pink) – 18
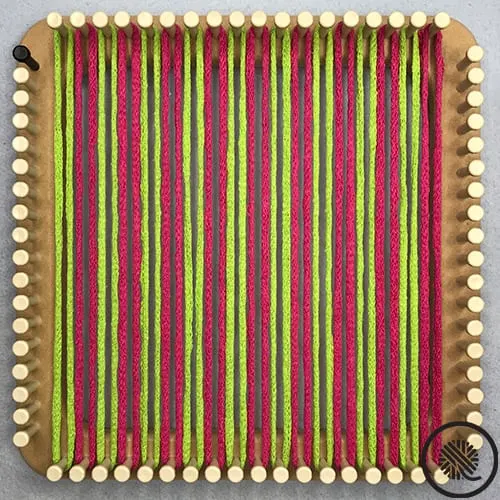
Striped Warp Color Sequence:
Alternate Color 1 then Color 2 on all the pegs.
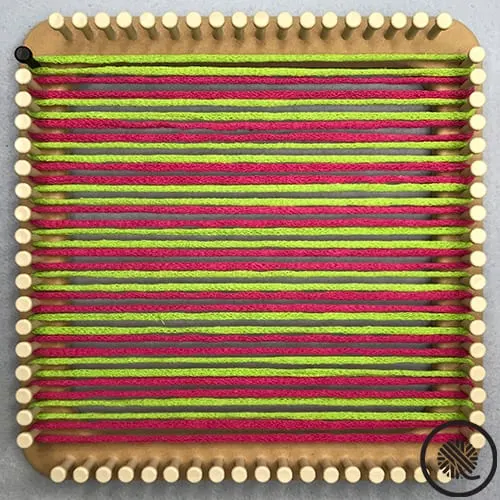
Striped Weave Color Sequence:
Alternate Color 1 then Color 2 on all the pegs.
4. Plaid Checkerboard (2-color)
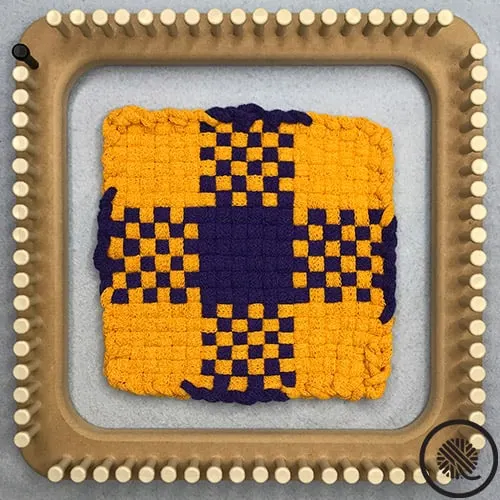
The Plaid Checkerboard creates solid and checked squares using just two colors.
Cotton Loops needed:
Color 1 (yellow) – 24
Color 2 (purple) – 12
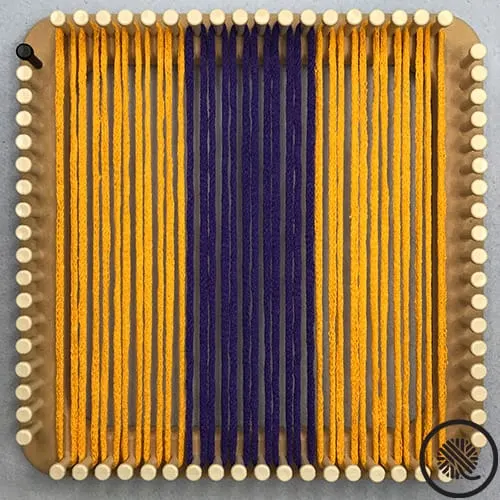
Plaid Checkerboard Warp Color Sequence:
- Place Color 1 on the first 6 pegs.
- Place Color 2 on the next 6 pegs.
- Place Color 1 on the last 6 pegs.
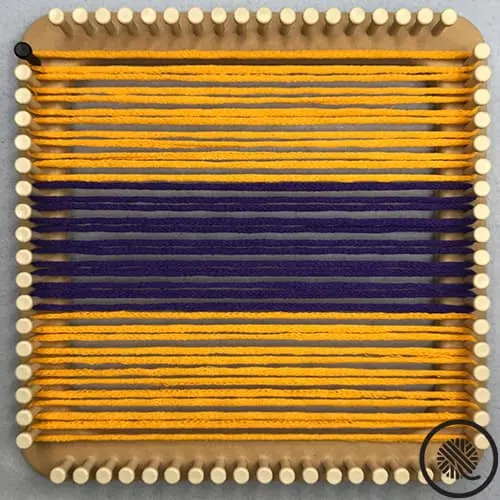
Plaid Checkerboard Weave Color Sequence:
- Weave Color 1 on the first 6 pegs.
- Weave Color 2 on the next 6 pegs.
- Weave Color 1 on the last 6 pegs.
5. Large Plaid (3-color)
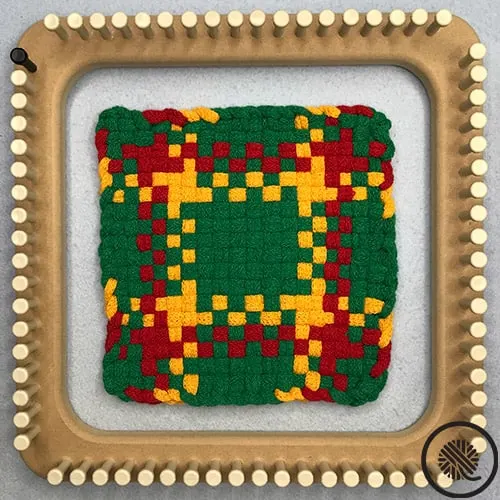
Nothing says classic like the Large Plaid hot pad design. The 3 colors cross each other and combine to create the iconic design.
Cotton Loops needed:
Color 1 (green) – 20
Color 2 (red) – 8
Color 3 (yellow) – 8
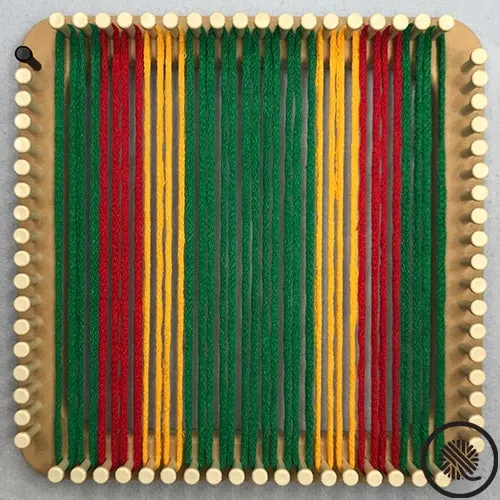
Large Plaid Warp Color Sequence:
- Color 1 on pegs 1-2.
- Color 2 on pegs 3-4.
- Color 3 on pegs 5-6.
- Color 1 on pegs 7-12.
- Color 3 on pegs 13-14.
- Color 2 on pegs 15-16.
- Color 1 on pegs 17-18.
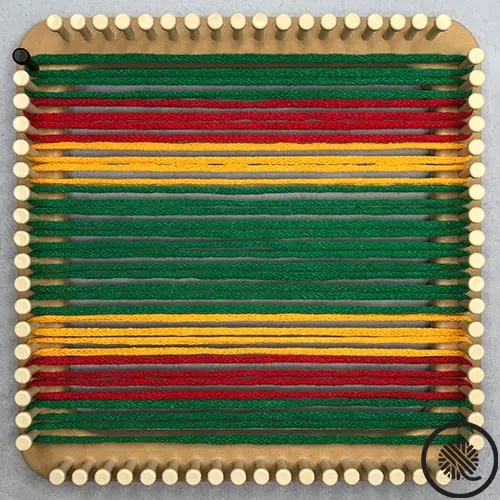
Large Plaid Weave Color Sequence:
- Color 1 on pegs 1-2.
- Color 2 on pegs 3-4.
- Color 3 on pegs 5-6.
- Color 1 on pegs 7-12.
- Color 3 on pegs 13-14.
- Color 2 on pegs 15-16.
- Color 1 on pegs 17-18.
6. Pinwheel (2-color)
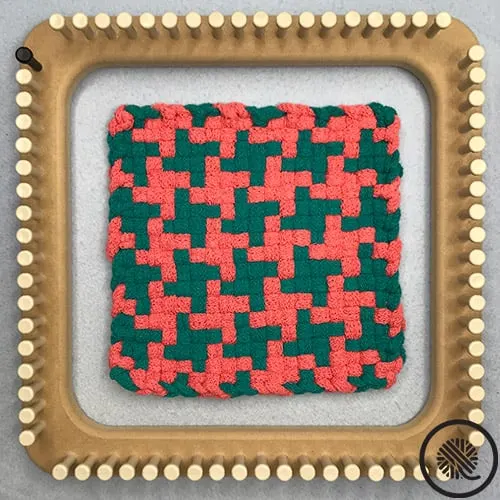
The Pinwheel potholder brings swirls of color into play. It reminds me of a houndstooth pattern.
Cotton Loops needed:
Color 1 (green) – 18
Color 2 (pink) – 18
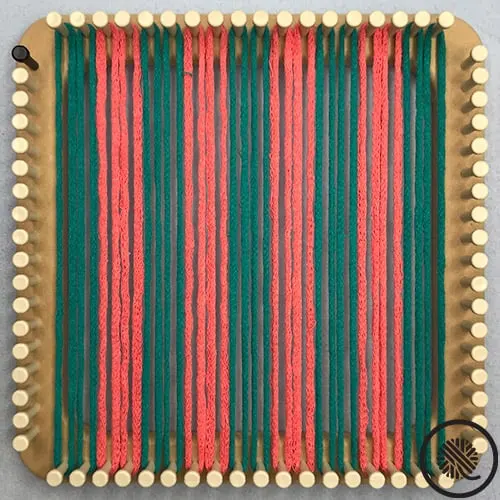
Pinwheel Warp Color Sequence:
- Place Color 1 on first 2 pegs.
- Place Color 2 on next 2 pegs.
- Continue alternating colors every 2 pegs to end.
- Finish with Color 1 on pegs 17-18.
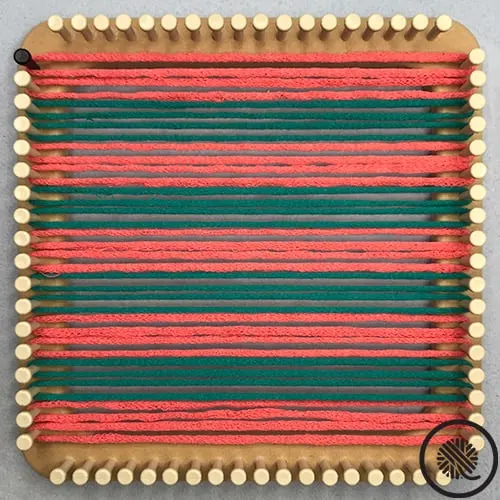
Pinwheel Weave Color Sequence:
- Weave Color 2 on first 2 pegs.
- Weave Color 1 on next 2 pegs.
- Continue alternating colors every 2 pegs to end.
- Finish with Color 2 on pegs 17-18.
7. Barbells and Beams (2-color)
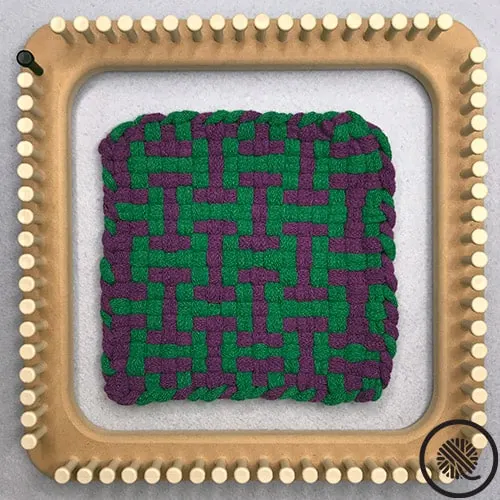
Barbells and Beams creates interlocking I’s using two colors.
Cotton Loops needed:
Color 1 (purple) – 18
Color 2 (green) – 18
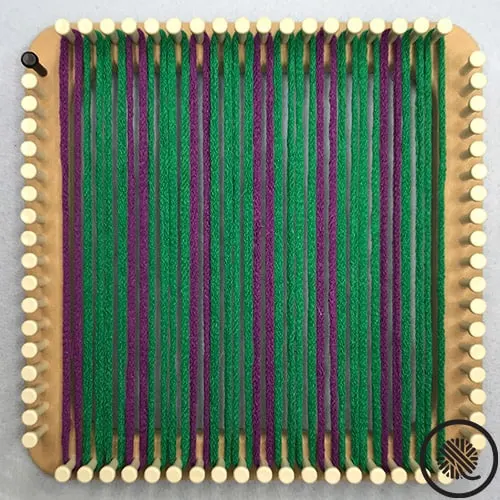
Barbells and Beams Warp Color Sequence:
- Place Color 1 on the first peg.
- Place Color 2 on the next 2 pegs.
- Continue this pattern to the end.
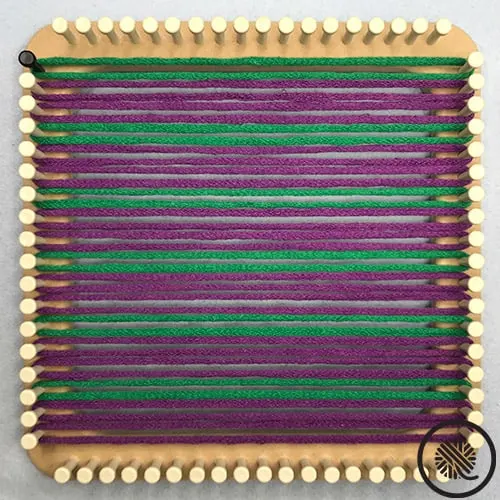
Barbells and Beams Weave Color Sequence:
- Weave Color 2 on the first peg.
- Weave Color 1 on the next 2 pegs.
- Continue this pattern to the end.
8. Thatch (2-color)
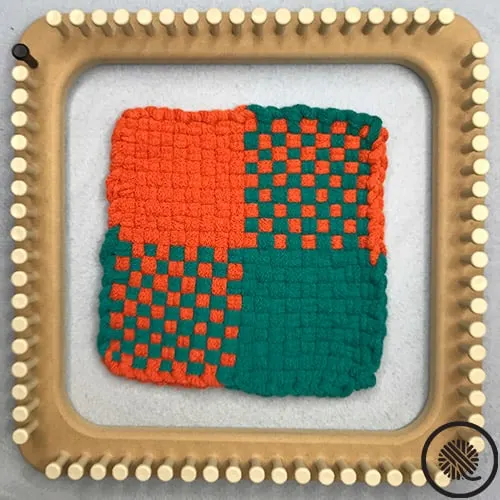
Solid and checked colorblocks bring that traditional woven look in the Thatch design.
Cotton Loops needed:
Color 1 (orange) – 18
Color 2 (teal) – 18
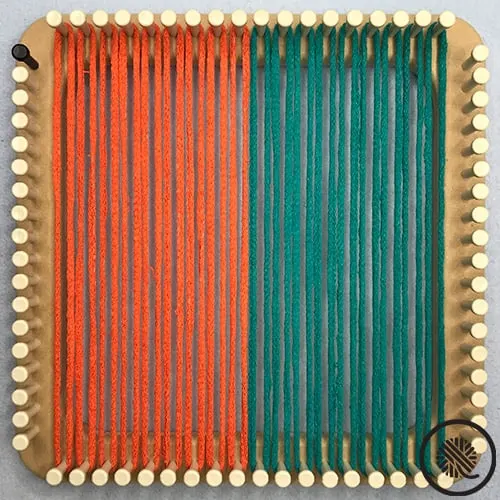
Thatch Warp Color Sequence:
- Place Color 1 on the first 9 pegs.
- Place Color 2 on the last 9 pegs.
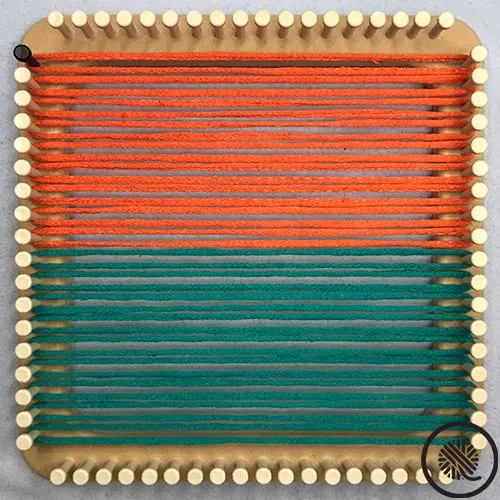
Thatch Weave Color Sequence:
- Weave Color 1 on the first 9 pegs.
- Weave Color 2 on the last 9 pegs.
9. Large Houndstooth (2-color)
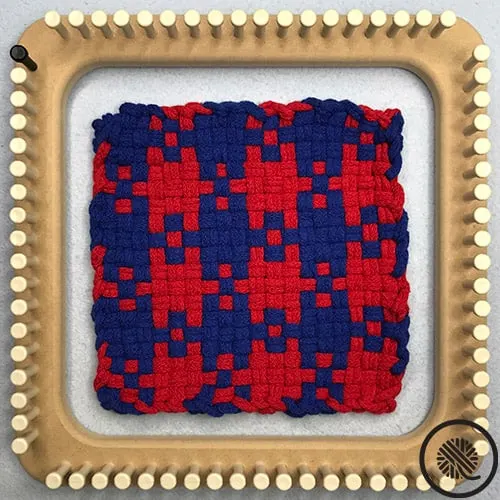
Similar to the Pinwheel design the Large Houndstooth creates interlocking puzzle pieces of color.
Cotton Loops needed:
Color 1 (blue) – 18
Color 2 (red) – 18
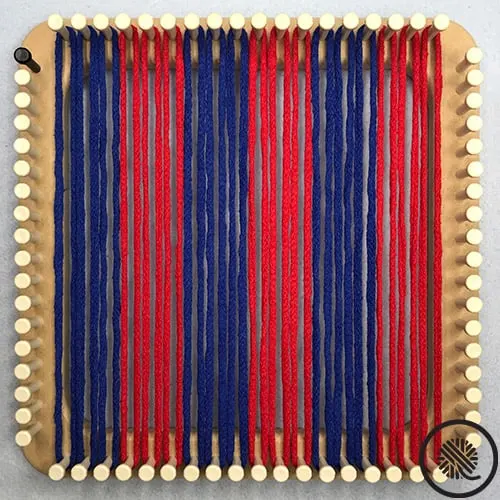
Large Houndstooth Warp Color Sequence:
- Place Color 1 on the first 3 pegs.
- Place Color 2 on the next 3 pegs.
- Continue alternating colors every 3 pegs to the end.
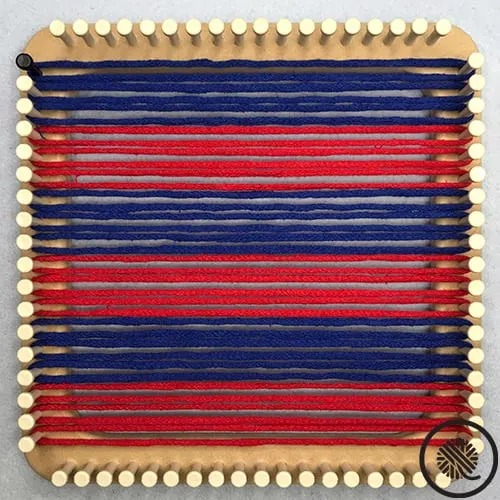
Large Houndstooth Weave Color Sequence:
- Weave Color 1 on the first 3 pegs.
- Weave Color 2 on the next 3 pegs.
- Continue alternating colors every 3 pegs to the end.

Judy Ruderman
Saturday 23rd of December 2023
Where did you get your loom?
Sharon
Saturday 28th of January 2023
Thank you for your simple to follow directions! I would love to make one that is 2 triangles. Would you be able to show how to do it? Thanks, Sharon
Carolyn
Tuesday 13th of December 2022
Thank you so much for making these easy-to-follow videos and providing the patterns. You are an excellent instructor and your warm personality makes these videos a pleasure to watch!
Sharon
Sunday 14th of August 2022
Where do you get your supplies from? Loom and hoops
Amy Stephen
Wednesday 3rd of August 2022
Double wow! Fantastic potholder patterns. Thanks so much.