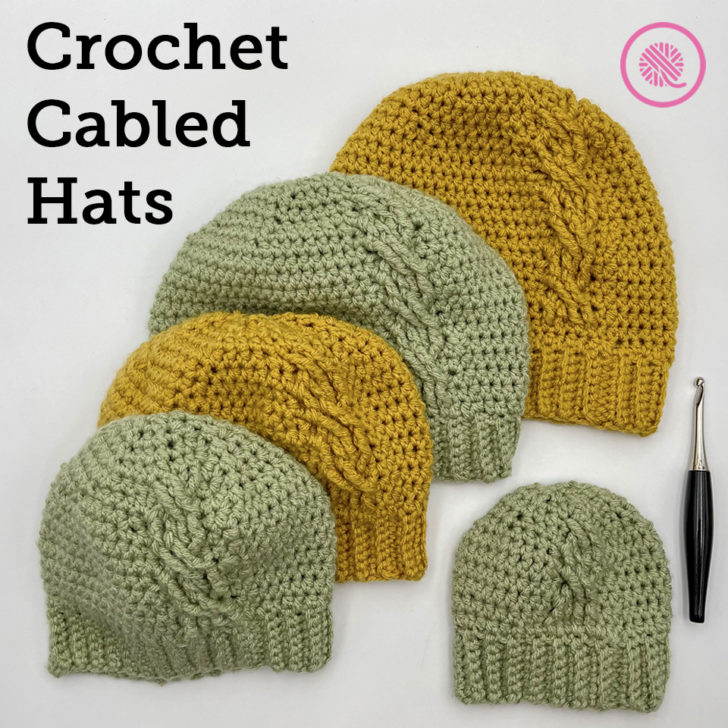

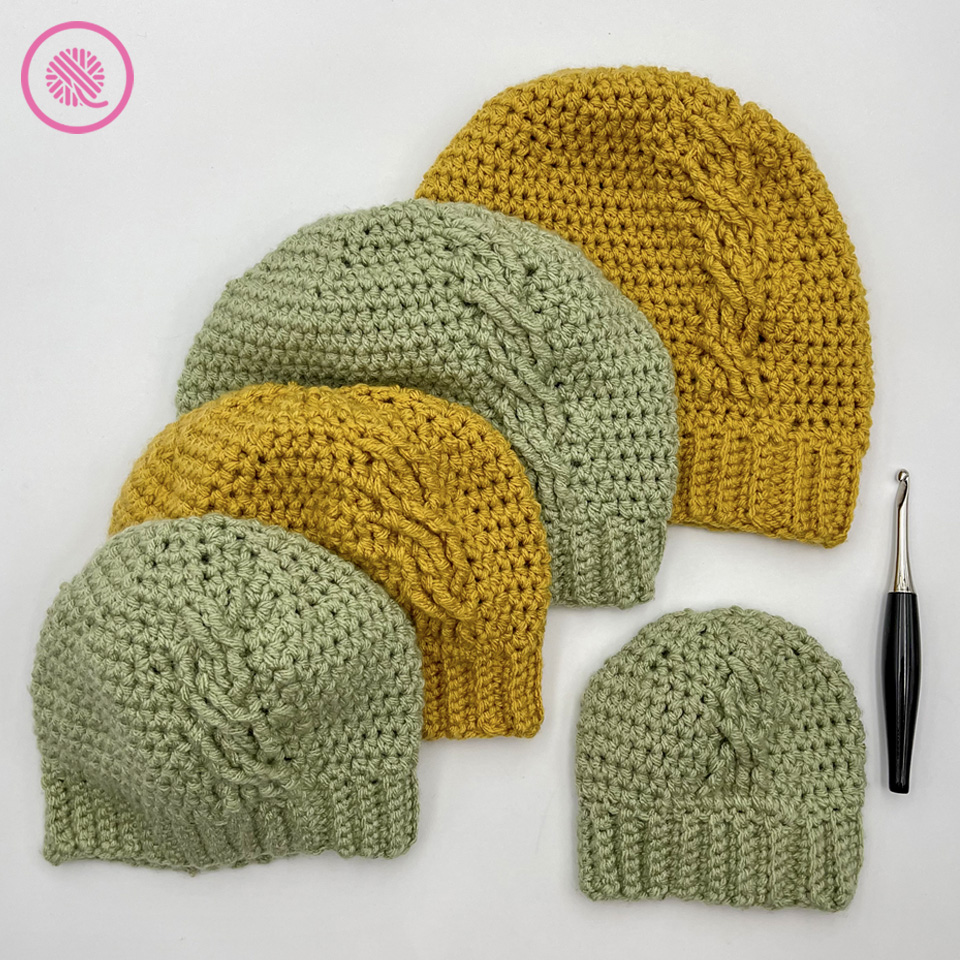
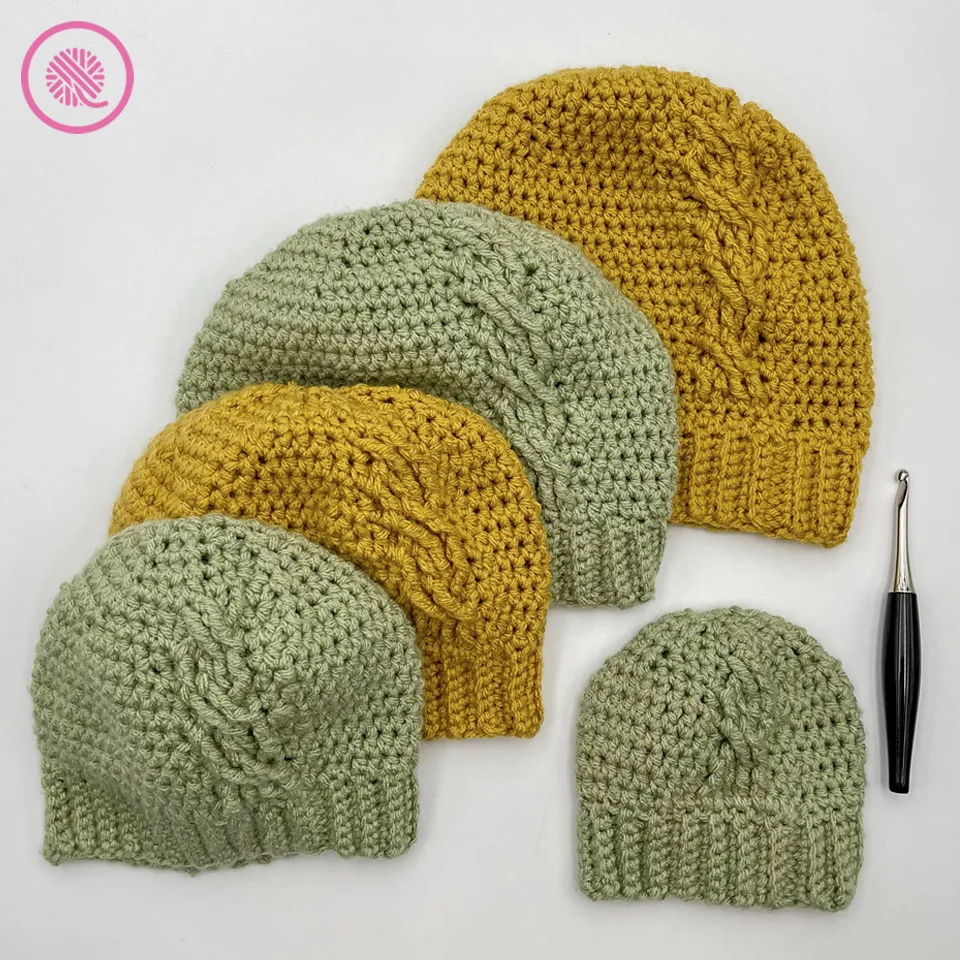
Inside: Free crochet Cabled Hats pattern with written instructions for 5 sizes from Baby to Adult and links to full crochet along tutorials for both right and left handed crocheters.
Cables for everyone!
You already know I love cables. When I designed the Cabled Linen Hats for loom knitters and needle knitters, I knew I had to design a cabled hat for my crochet peeps.
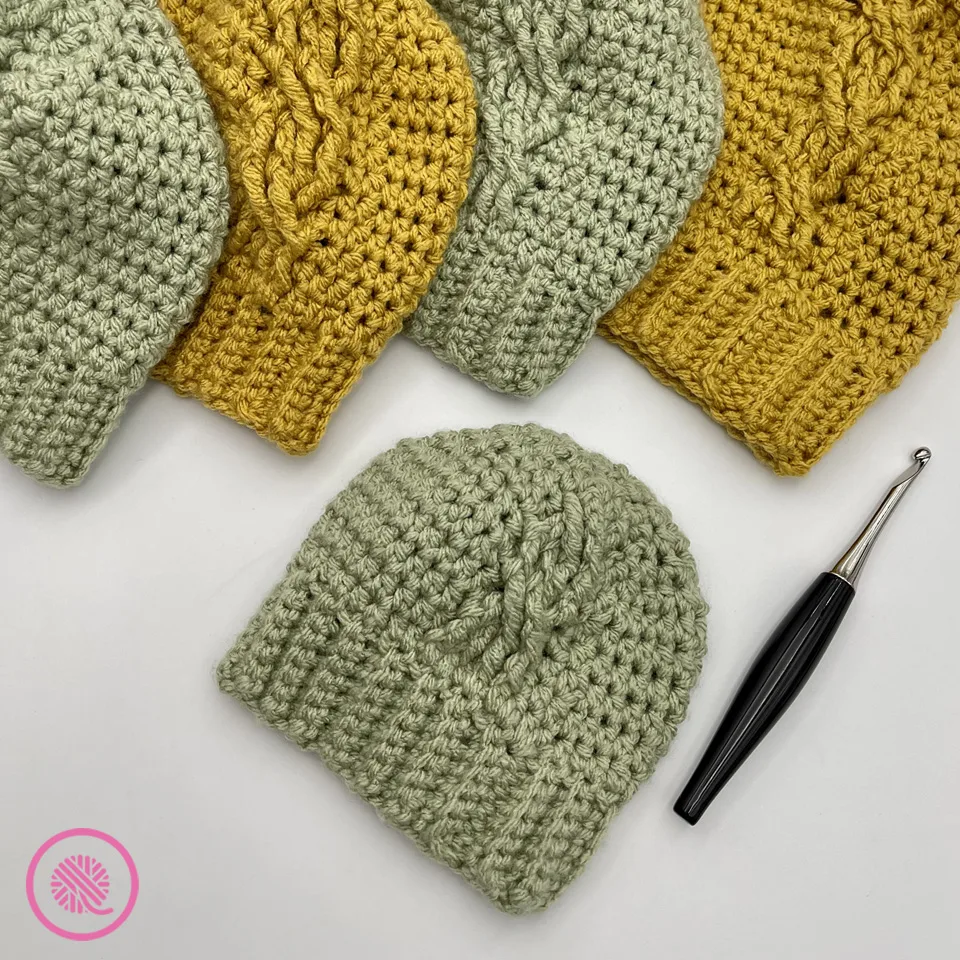
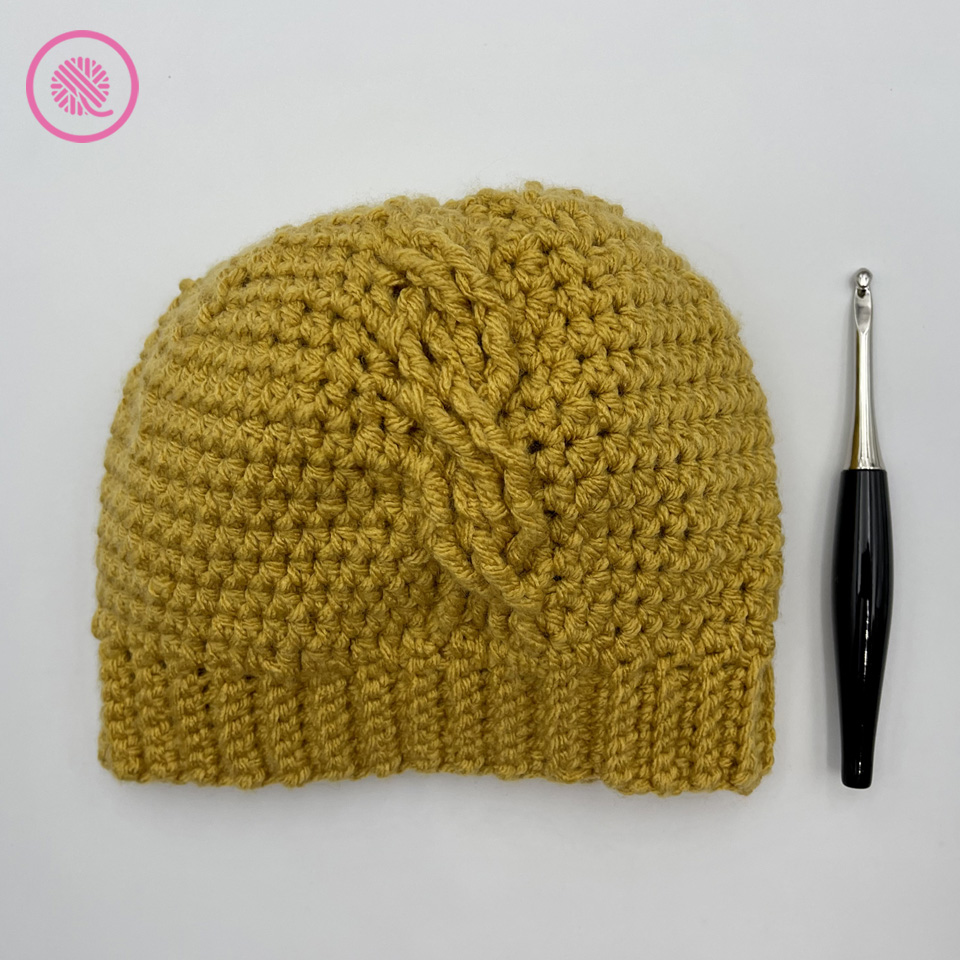
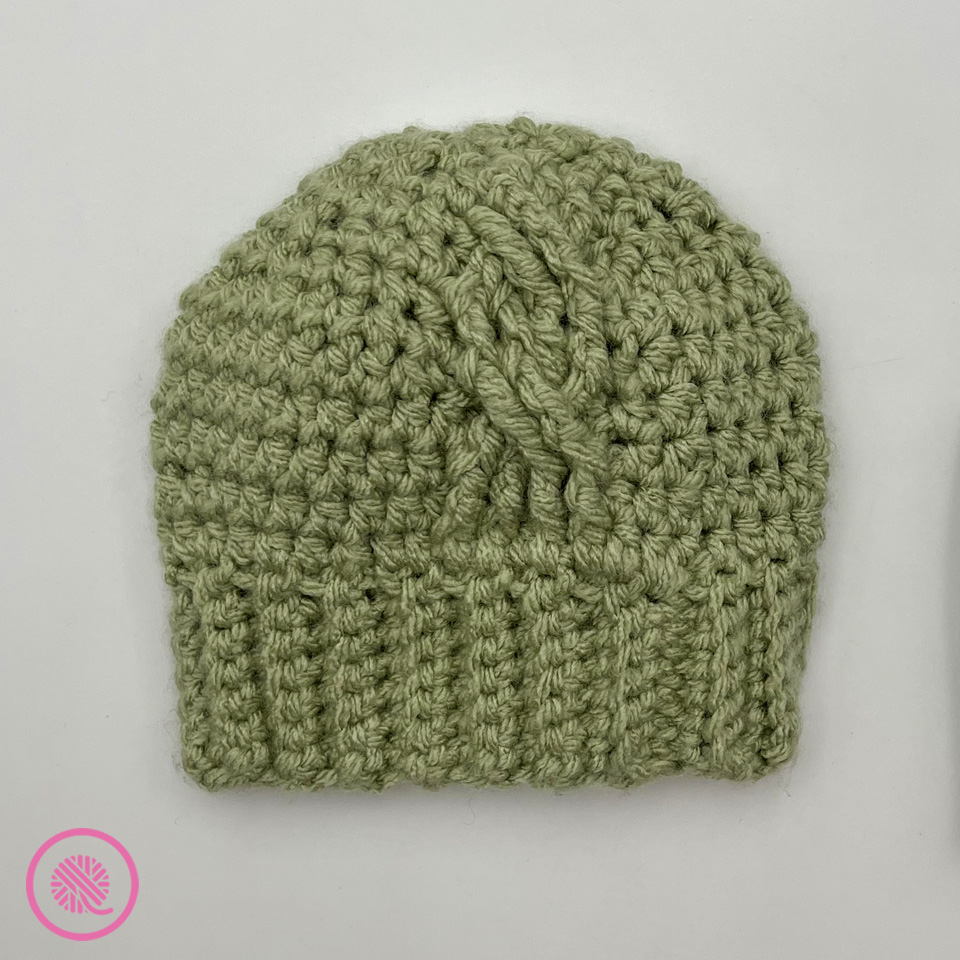
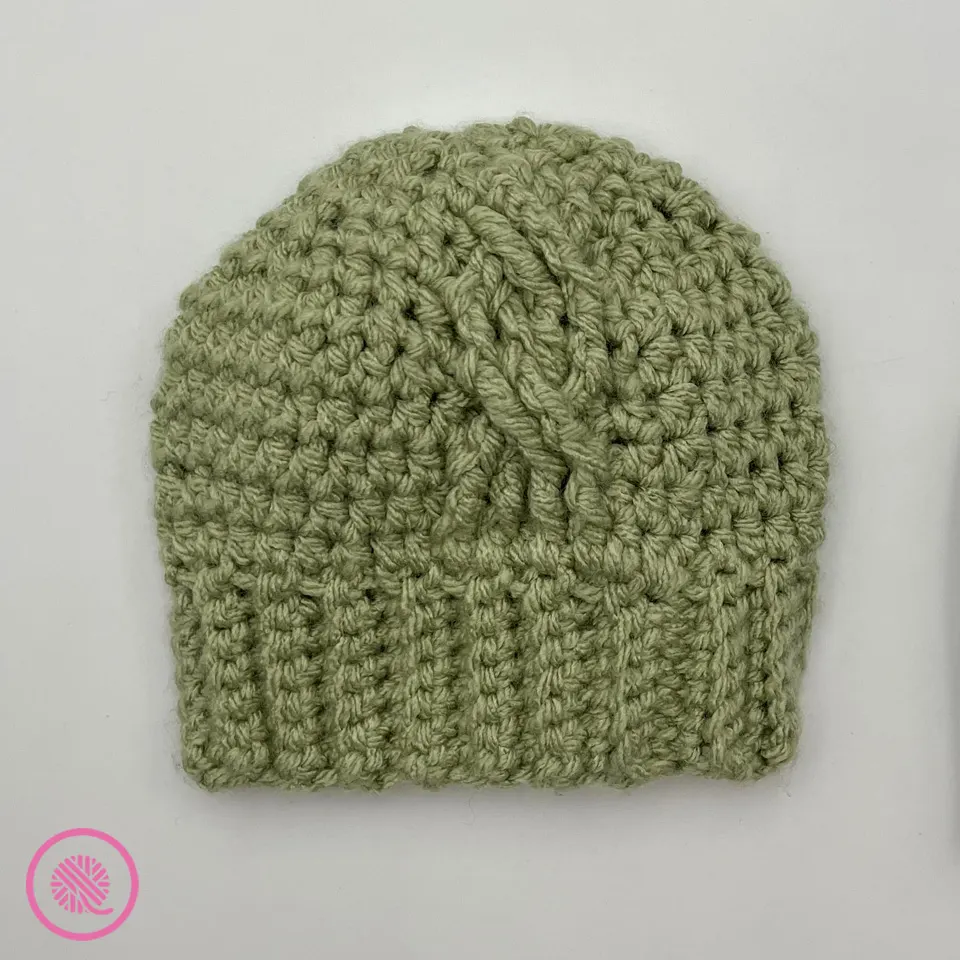
The Cabled Hats feature a ribbed brim, half-double crochet body with a single cable and shaped crown. The brim is worked flat while the remainder of the hat is worked in the round.
Pattern includes written instructions for 5 sizes of hats from Baby to Adult and links to fully captioned tutorial videos for both left and right handed crocheters.

Crochet Cabled Hats
By Kristen Mangus
A downloadable PDF of this pattern is available in my Etsy store or from Ravelry at the links below:


MATERIALS
(Materials list may contain affiliate links to products I used to make this project. Using these links cost you nothing, but helps support GKK.)
Yarn
Bulky (#5) weight yarn 65 (115, 140, 170, 190 yds.)
Yarn Bee Soft & Sleek Chunky (5 oz./142 g, 211 yds./193 m) in colors Sage & Mustard used in samples.
Hook
US Size H (5 mm) & J (6 mm) crochet hooks (both sizes needed)
Furls Crochet Odyssey hooks used in sample.
Tapestry needle
Locking stitch marker
ABBREVIATIONS
Approx – Approximately
Ch – Chain
DEC – Decrease; Insert hook in next st, yo and pull up a loop, insert hook into next st, yo and pull up a loop. Yo and pull through all loops.
Fpdtr – Front Post Double Treble Crochet
Fptr – Front Post Treble Crochet
Hdc – Hale Double Crochet
INC – Increase; repeat previous stitch in same stitch so that 2 stitches are in the same space.
Patt – Pattern
Rem – Remaining
Rnd – Round
Sc – Single Crochet
Sl – Slip
St(s) – Stitch(es)
If you need a refresher, be sure to check out my How to Crochet series!
GAUGE
13 sts x 10 rows in 4” (10 cm) in hdc st
SKILL LEVEL Easy
MEASUREMENTS
Baby: 12.5″ circumference x 6” tall (31.8 x 15.2 cm)
Child: 17.5″ circumference x 8” tall (44.5 x 20.3 cm)
Teen: 22.5″ circumference x 8.5” tall (57 x 21.6 cm)
Women: 22.5″ circumference x 9.5” tall (57 x 24 cm)
Men: 23.75″ circumference x 10” tall (60.3 x 25.4 cm)
SIZES
Baby (Child, Teen, Women, Men)
NOTES
Brim Note: The ribbed brim is worked as a flat panel. Brim will stretch out over time. We make up for this by stretching the fabric out slightly before connecting the brim to release the tension. Pre-stretching the brim gives a better fit later on. All brims will still be worked with final circumference 1-2” less than the hat to ensure a good fit.
Cable Note: The pattern below includes instructions for both a Cable Left and Cable Right. Since working a Cable Left is an easier method Round 5 of the Hat Body the pattern is written with a Cable Left. If you prefer the look of a Cable Right, an alternate set of instructions for Rnd 5 are listed in italics in the pattern. Choose only one set of cable instructions for your hat.
Optional Messy Bun Hat: To make this pattern as a messy bun hat, when you decrease the top to desired size, cut the yarn tail and pull the tail through the final loop without cinching the top. Weave in ends.

INSTRUCTIONS
BRIM (worked as a flat panel)
With H (5 mm) hook, Ch 9 for flat brim or 18 for folded brim. (Brim is approx 2” for flat brim)
Row 1: Sc in 2nd ch from hook; 1 loop only. Sc in each ch across all sts. You will have 1 st less than you began. Do not chain.
Row 2: Turn. Sc in back loop only in each st. Maintain st count.
Rep Row 2 until 2” less than desired circumference. Approx rows 42 (60, 68, 68, 72). TIP: After ending the last row the working yarn should be on the opposite side as the beginning yarn tail.
Stretch out brim slightly to release tension and measure. (See Brim Note above.) Remove or add more rows as needed until stretched brim measures 12” (17”, 19.5”, 19.5”, 20.5”) [30.5 (43, 49.5, 49.5, 52) cm].
Connect brim:
Fold rectangle brim in half aligning the short ends. Slip 1st st and last row together going through both loops on each end. Slip across all sts.
For flat brim: Flip so the seam is on the inside and continue with Hat Body below.
For folded brim: Continue hat body below working with seam facing outward. The seam will be hidden when the brim is folded.
HAT BODY (worked in the round)
Switch to J (6 mm) hook for the remainder of the hat.
Rnd 1: Ch 1. Hdc in st before 1st rib. Hdc in same st to INC. *At top of next rib hdc. Hdc in next st before next rib. Rep from * until halfway around hat. INC1 into next st and continue as before. Sl into 1st hdc to complete round. 44 (62, 70, 70, 74) sts
Rnd 2: Ch 1, hdc in same st as ch 1 and in each st around. Sl into 1st hdc to complete round.
Rnd 3: Ch 1, hdc in same st as ch 1 and in next st. *Fptr in next 2 sts 2 rows below. Hdc in next st, making sure to skip 2 sts that line up with the Fptr just made. Repeat from *1 more time. Hdc in next st, making sure to skip 2 sts that line up with the last Fptr. Hdc in each rem st in rnd. Sl into 1st hdc to complete rnd.
Rnd 4: Same as Rnd 2.
Rnd 5 (Cable Left): Ch 1. Hdc in same st as ch 1 and in next st. Skip 3 sts, fpdtr in next 2 sts 2 rows below [work into 2nd group of 2 posts]. DEC 1 into 2nd & 3rd skipped st. Working in front of post stitches just made, fpdtr around 2 skipped sts 2 rows below [work into 1st group of 2 posts skipped]. DEC 1 in 2nd & 3rd skipped st. Hdc in rem sts in rnd. Sl to join.
[Alternate Cable Right Instructions: Work these only if you are not working Rnd 5 as written above.
Rnd 5 (Cable Right): Ch 1. Hdc in same st as ch 1 and in next st. Skip 3 sts, fpdtr in next 2 sts 2 rows below [work into 2nd group of 2 posts]. DEC 1 into 2nd & 3rd skipped st. Working behind post stitches just made, fpdtr around 2 skipped sts 2 rows below [work into 1st group of 2 posts skipped]. DEC 1 into 2nd & 3rd skipped st. Hdc in rem sts in rnd. Sl to join.]
Rep Rnds 2-5 until piece measures approximately 4” (5.5”, 5.5”, 7”, 7”) inches [10 (14, 14, 17.8, 17.8) cm] or until desired length. End after a Rnd 5.
SHAPE TOP
Rnd 6: Ch 1. *Hdc in next 7 sts. DEC 1. Rep from * 3 (5, 5, 5, 1) times. Hdc in next rem sts in rnd. Sl to join. 40 (56, 64, 64, 72) sts rem.
Rnd 7: Ch 1, hdc in next 2 sts. Fptr in next 2 sts 2 rows below. DEC 1 into 2nd & 3rd skipped st. Fptr in next 2 sts 2 rows below. DEC 1 into 2nd & 3rd skipped st. *Hdc 2 (4, 5, 5, 7), DEC 1. Rep from * to end of Rnd. Sl to join. 32 (48, 56, 56, 64) sts rem.
Rnd 8: Ch 1, *Hdc 3 (4, 5, 5, 7), DEC 1. Rep from * to end of Rnd. Sl to join. 24 (40, 48, 48, 56) sts rem.
Rnd 9: Ch 1. *Hdc in same st as ch 1 only. Skip 3 sts, fpdtr in next 2 sts 2 rows below [work into 2nd group of 2 posts]. Hdc in 2nd skipped st. Working in front of post stitches just made, fpdtr around 2 skipped sts 2 rows below [work into 1st group of 2 posts skipped]. DEC in 2nd skipped st. Hdc in ea st until 2 sts rem in rnd. DEC Sl to join.
Rnd 10: Ch 1, *Hdc 1 (3, 4, 4, 5), DEC 1. Rep from * to end of Rnd. Sl to join . 16 (32, 40, 40, 48) sts rem.
Rnd 11: Ch 1, *Hdc 0 (2, 3, 3, 4), DEC 1. Rep from * to end of Rnd. Sl to join . 8 (24, 32, 32, 40) sts rem. [Baby Size continue with FINISHING below.]
Rnd 12: Ch 1, *Hdc X (1, 0, 0, 3), DEC 1. Rep from * to end of Rnd. Sl to join . X (16, 16, 16, 32) sts rem.
Rnd 13: Ch 1, *Hdc X (X, X, X, 0), DEC 1. Rep * from to end of Rnd. Sl to join . X (8, 8, 8, 16) sts rem. [Child, Teen and Woman Sizes continue with FINISHING below.]
Rnd 14: Ch 1, *Hdc X (X, X, X, X), DEC 1. Rep from * to end of Rnd. Sl to join . X (X, X, X, 8) sts rem. [Men Size continue with FINISHING below.]
FINISHING
Cut long tail and pull through st. Thread end through 8 rem sts and draw up tightly. Fasten securely. Weave in tails.
PIN IT!


Crochet Cabled Hats Crochet Along Tutorial Videos
Select videos are available to GoodKnit Kisses YouTube members only. To get exclusive access to GKK VIP-only content, free PDF patterns, weekly Zoom meetup and more, sign in to YouTube and join as a VIP Member today! Find out more about GKK Membership HERE!
The following videos walk you through the entire pattern from beginning to end.
Right handed
Left handed
If you liked this pattern, try my other crochet hat patterns: